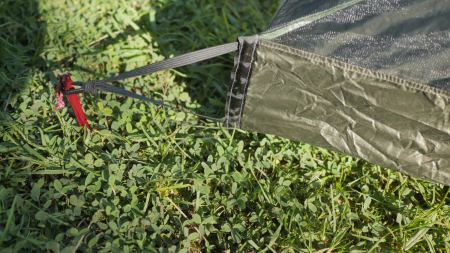
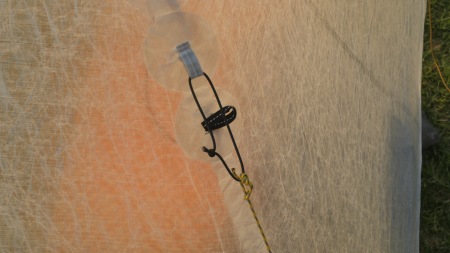
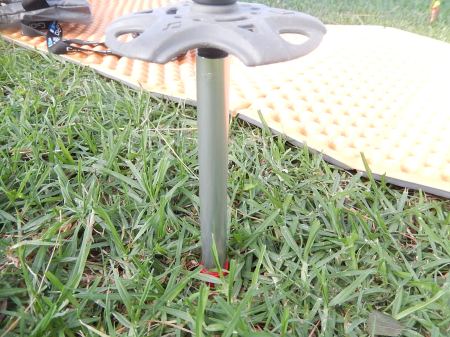
Elastic pullout to stake
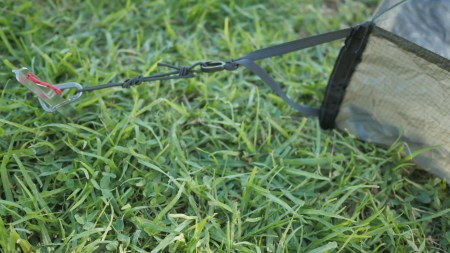
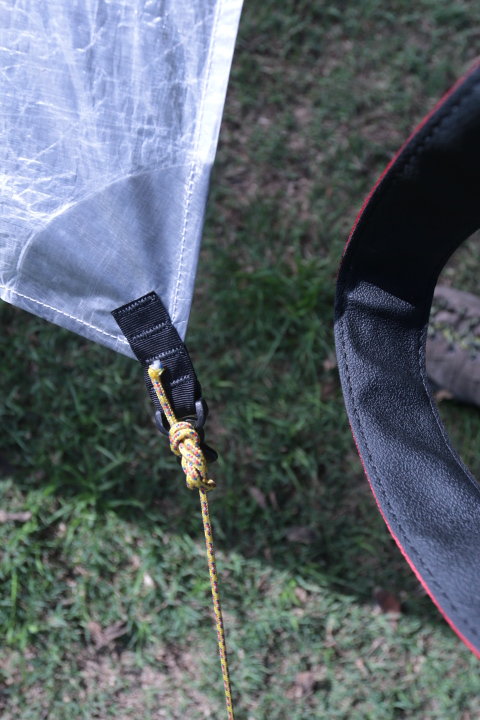
modified pullout

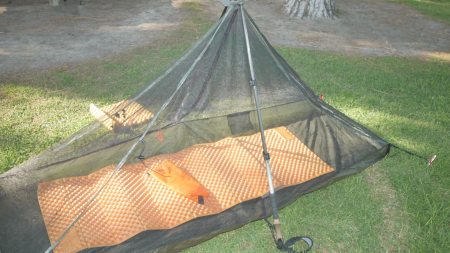
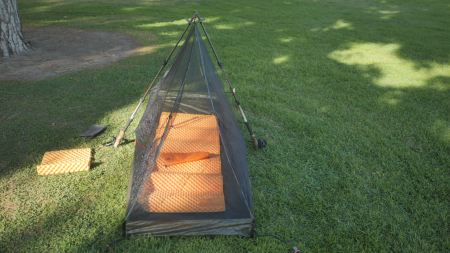
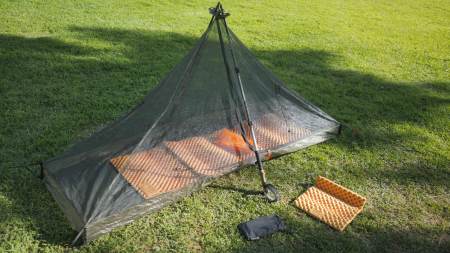
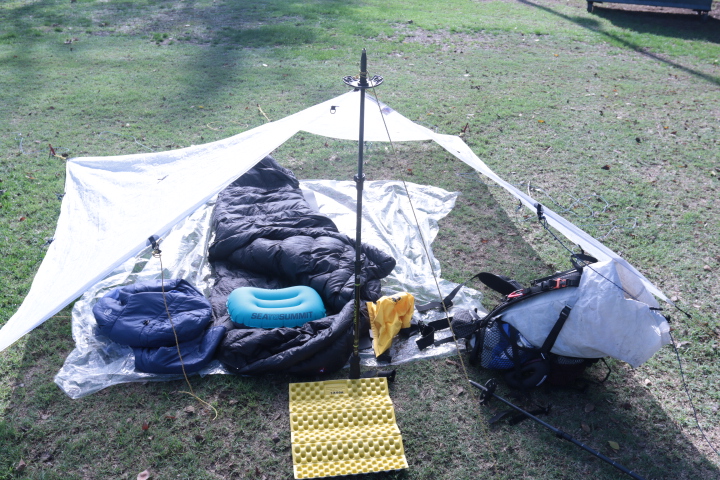
2 poles used to erect shelter

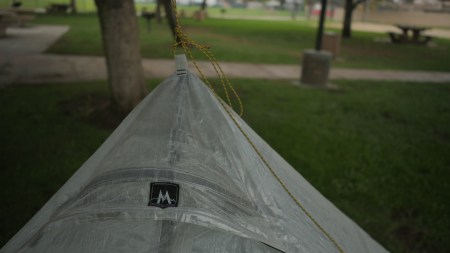
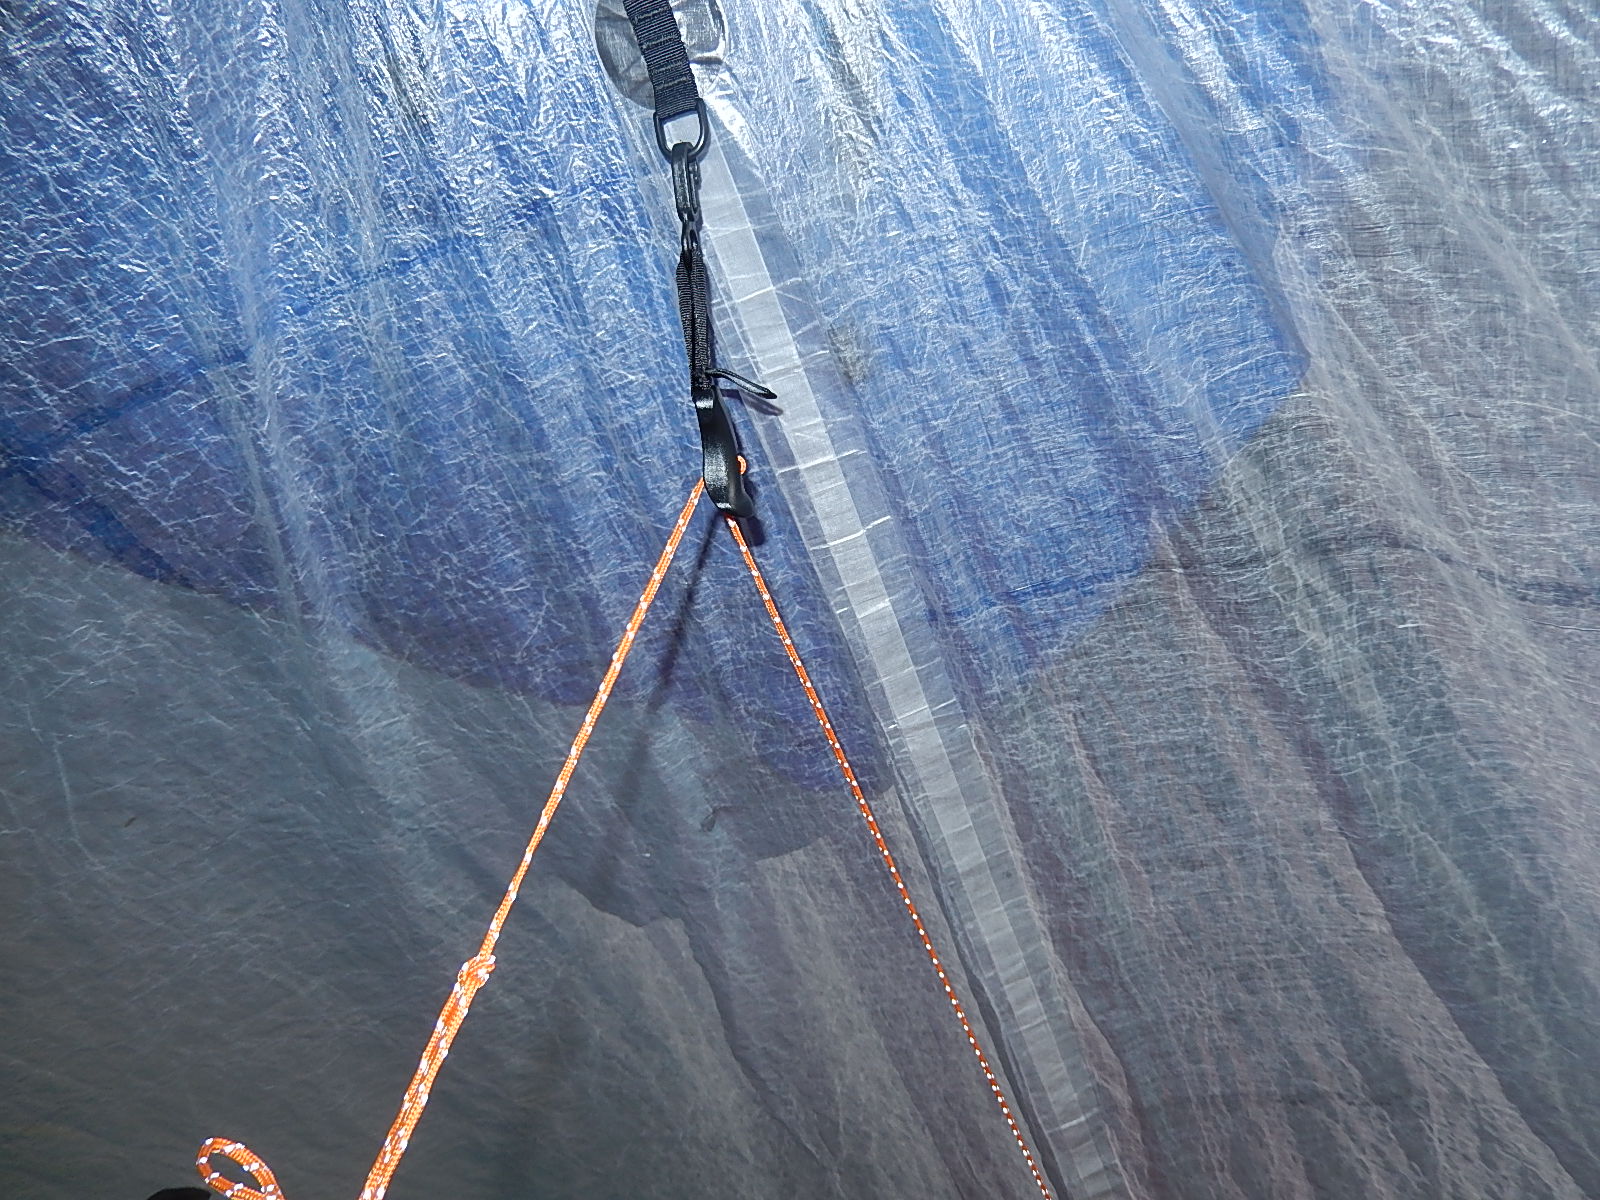
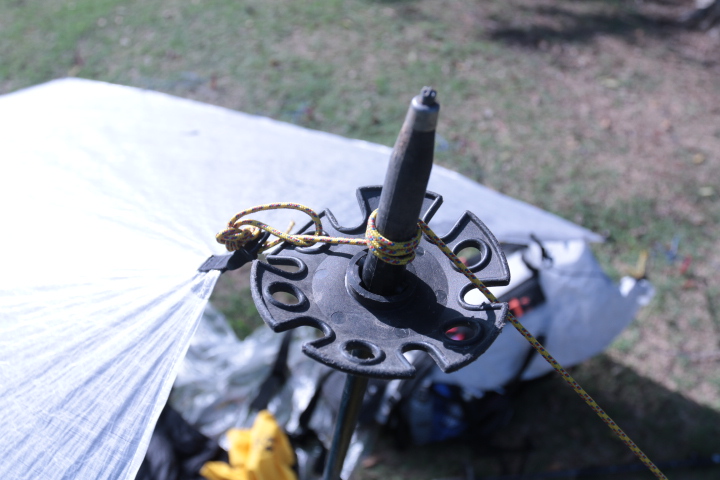
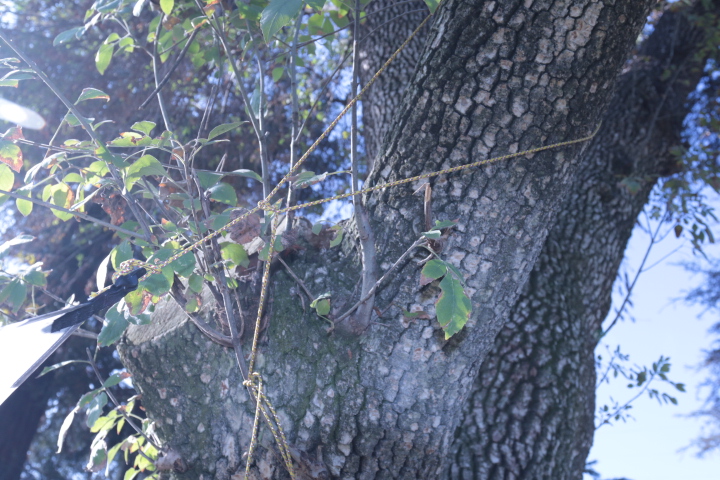
detail of UL cords securing pole tips
side view of shelter-set poles @ 120 cm or longer

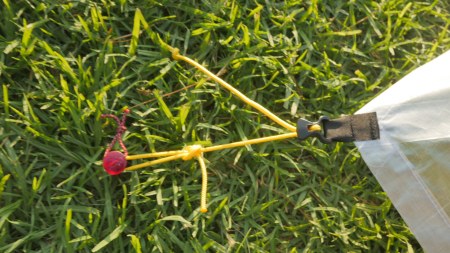
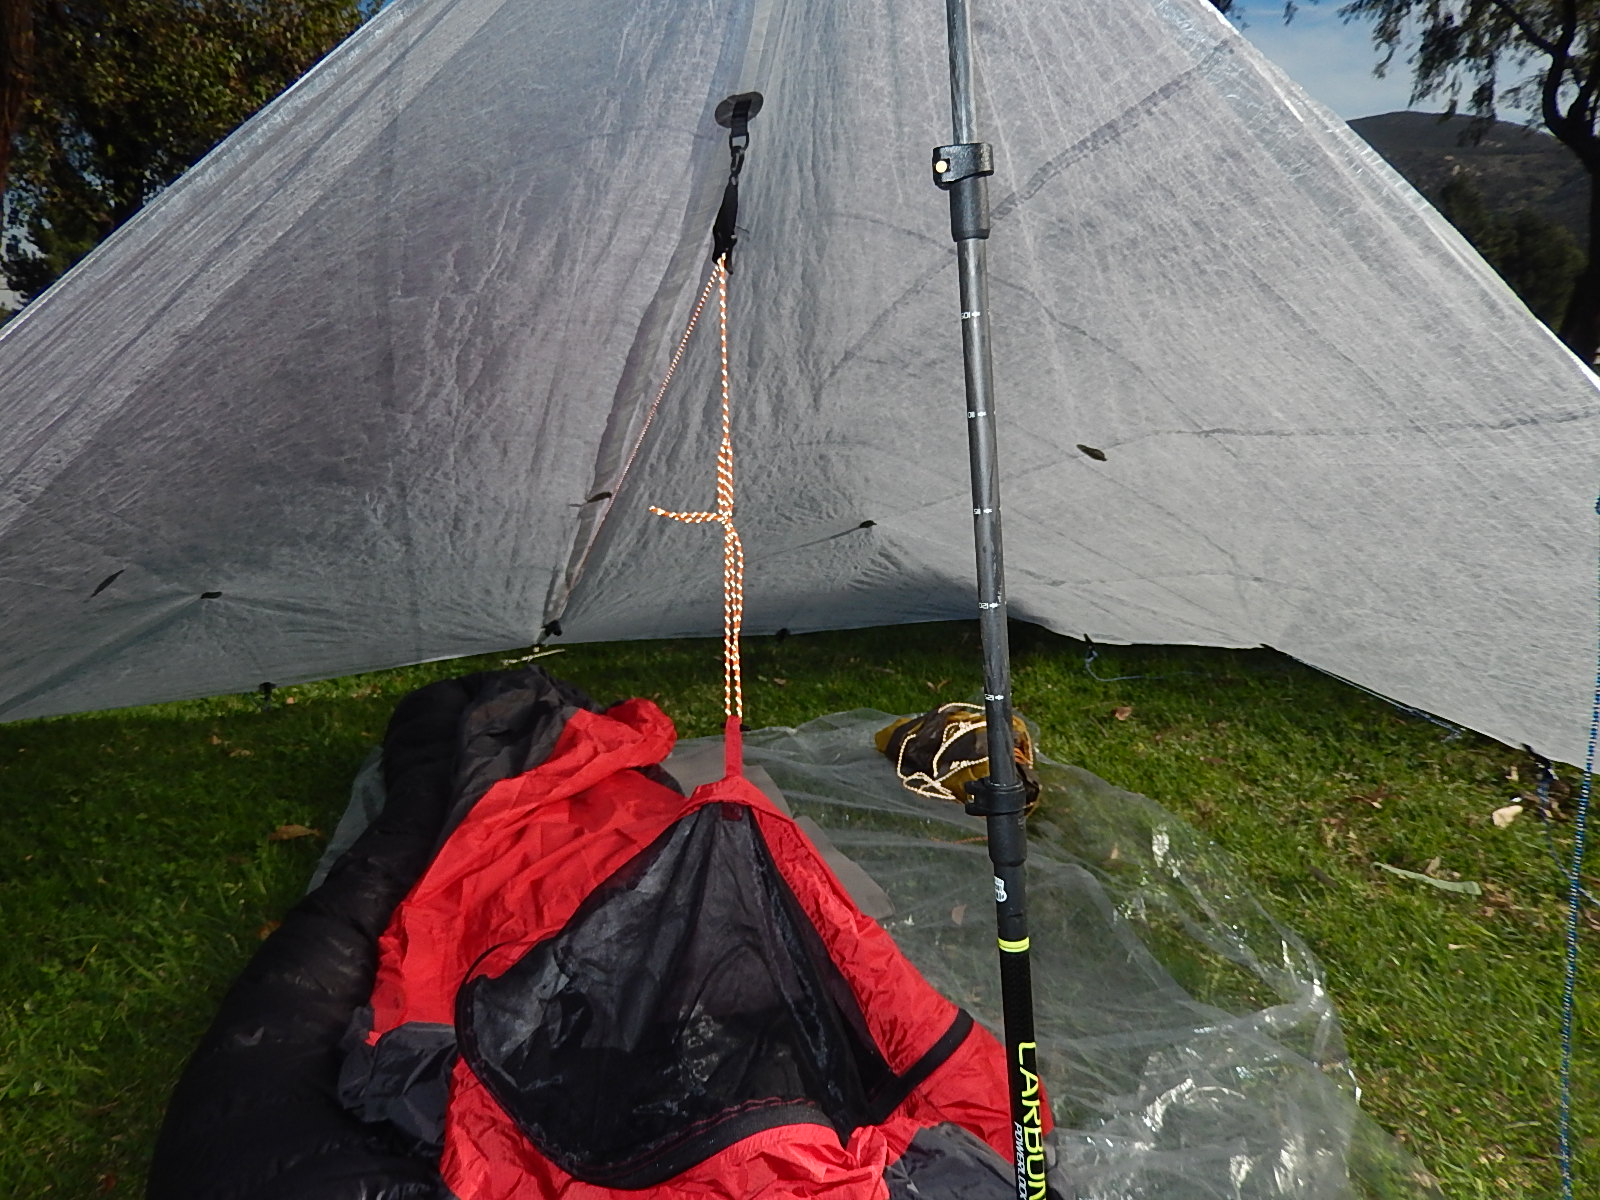
detail of shock cord to pole handle
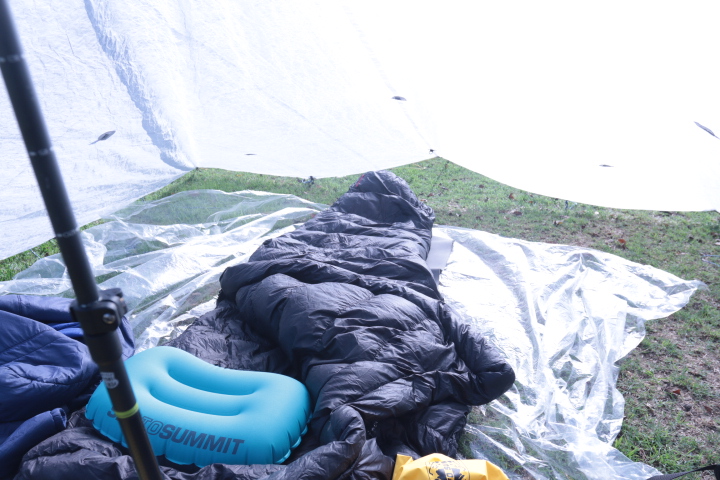
enter via zipper at right
Elastic pullout to stake
modified pullout
2 poles used to erect shelter
detail of UL cords securing pole tips
side view of shelter-set poles @ 120 cm or longer
detail of shock cord to pole handle
enter via zipper at right

2 black button-type snaps on the front panel allow closure from inside, releasing tension on the zipper. A third snap is located at the foot of the same panel


This shelter height is achieved using a total pole length of c 145 cm, including pole jack
4 corner anchors using MSR Carbon Core stakes
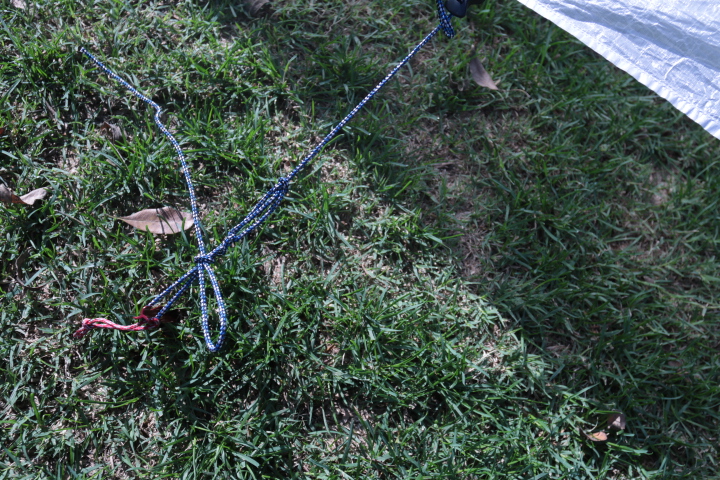
Detail of mid-corner guylines attached to bungee cords


If needed, the attachment clips shown on the interior of the shelter can support a biv sack netting away from the user’s face- as well as use for inner mesh net

Large peak vent- from inside, the upper larger wand or strut can be removed to allow closure in storms
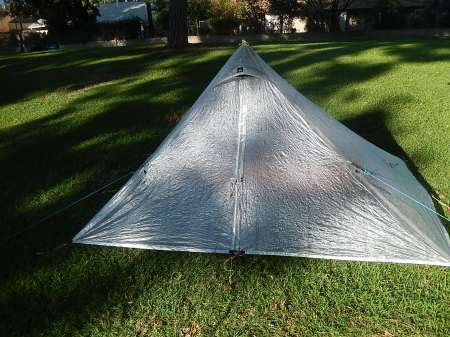
The apparent translucency of the cuben material changes with exterior light intensity and direction

next to the top of the trek pole is the black, small plastic clip which allows hanging of the inner mesh net- I connect this to microcarabiners to prevent damage to the clip
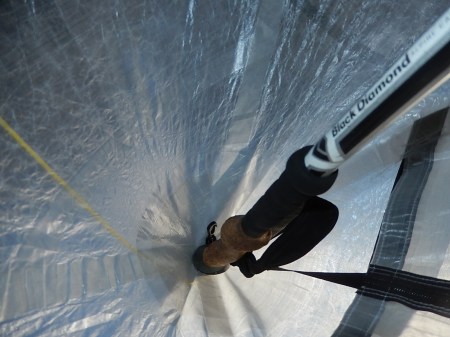
6 in =10cm pole jack attached to trek pole tip
The Duomid ($440) arrived 5 weeks and 3 days after ordering online from MLD.com, located in Roanoke, VA. The shelter weight is 14 oz for 1-2 persons; I will be writing separately about the modular, Solo silnylon inner tent which hangs within this shell as needed for insect protection ($175).
The tarp was sent with a 10 cm= 6 in pole jack, which extends a standard trek pole if needed for a taut pitch. I find that to pitch near the ground, my 130 cm trek pole alone can work but the pitch is probably more wind-resistant using the extension. I use 12 stakes as standard. The shelter has 8 ground-level tieouts and 8 mid-tieouts, with a peak hang tieout=17 total.
With the option of hanging the tarp from its apex if desired, no pole or stick needed in appropriate locations.
There’s a great deal of covered space – over 45 sq ft- a palace for one with a huge covered vestibule… I would be fine using for 2 so long as the conditions were not very wet, because one person would need to cross the other inside. The peak vent is well designed including an integral stiffener, and can be completely closed if need arises.
Being made of Dyneema/cuben, this shelter is extremely light and does not absorb water, with almost no stretch after pitching. I like that there is adequate privacy, but at the same time I can judge weather as it is translucent and do not need a dedicated window built in.
I will be treating the one front door zipper with care, including closing the base buckle before operating it to reduce stress. I opted to use Zip Care lubricant as well, available from MLD.
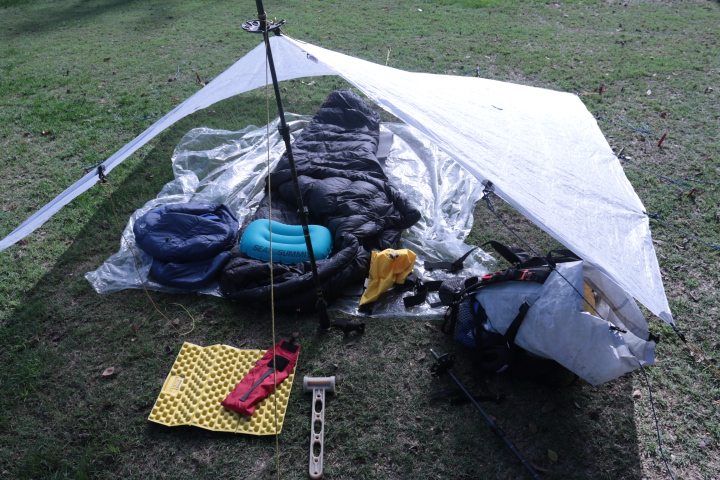
Spent a full day and evening at Applewhite elevation 3300 ft, in the Lytle Creek region of southern CA. The Titanium Goat Ptarmigan biv sack was excellent underneath my HMG square tarp, in a 40 deg F Marmot Atom sleeping bag. Hardly even noticed the smoke from 10 campfires blazing around me… should have chosen site #2…..
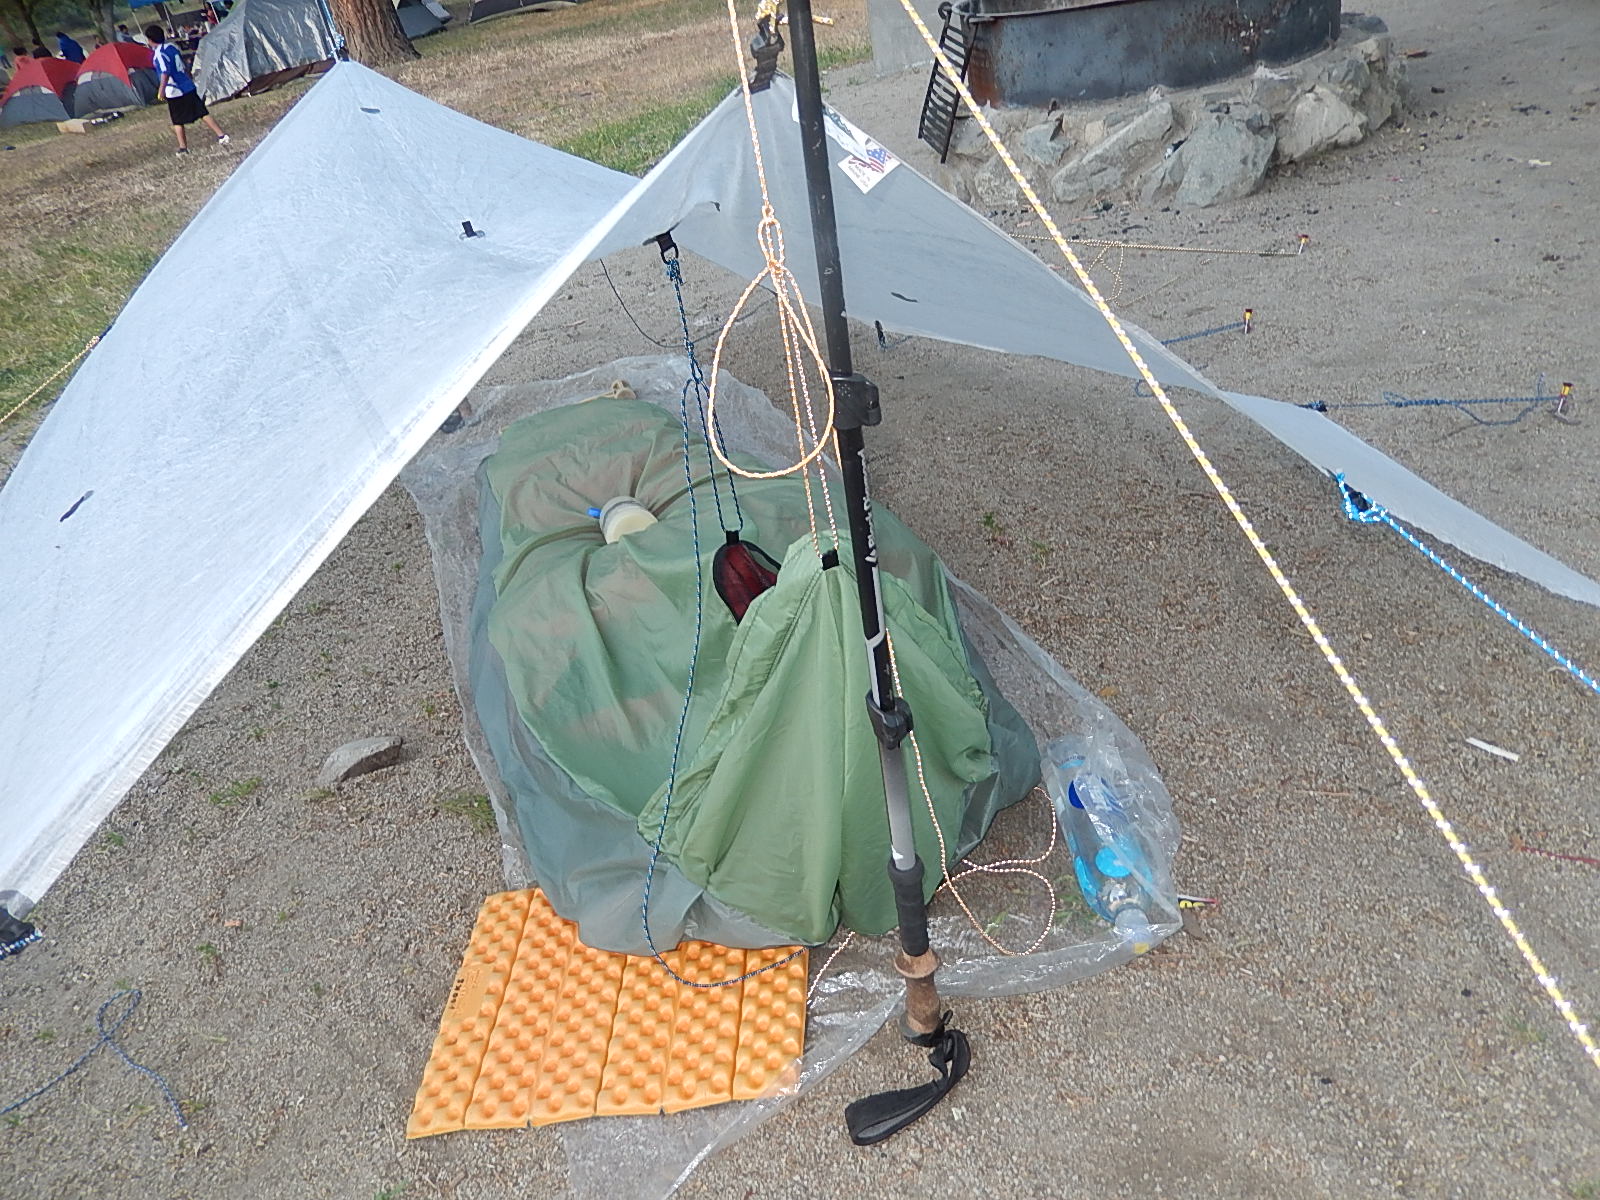
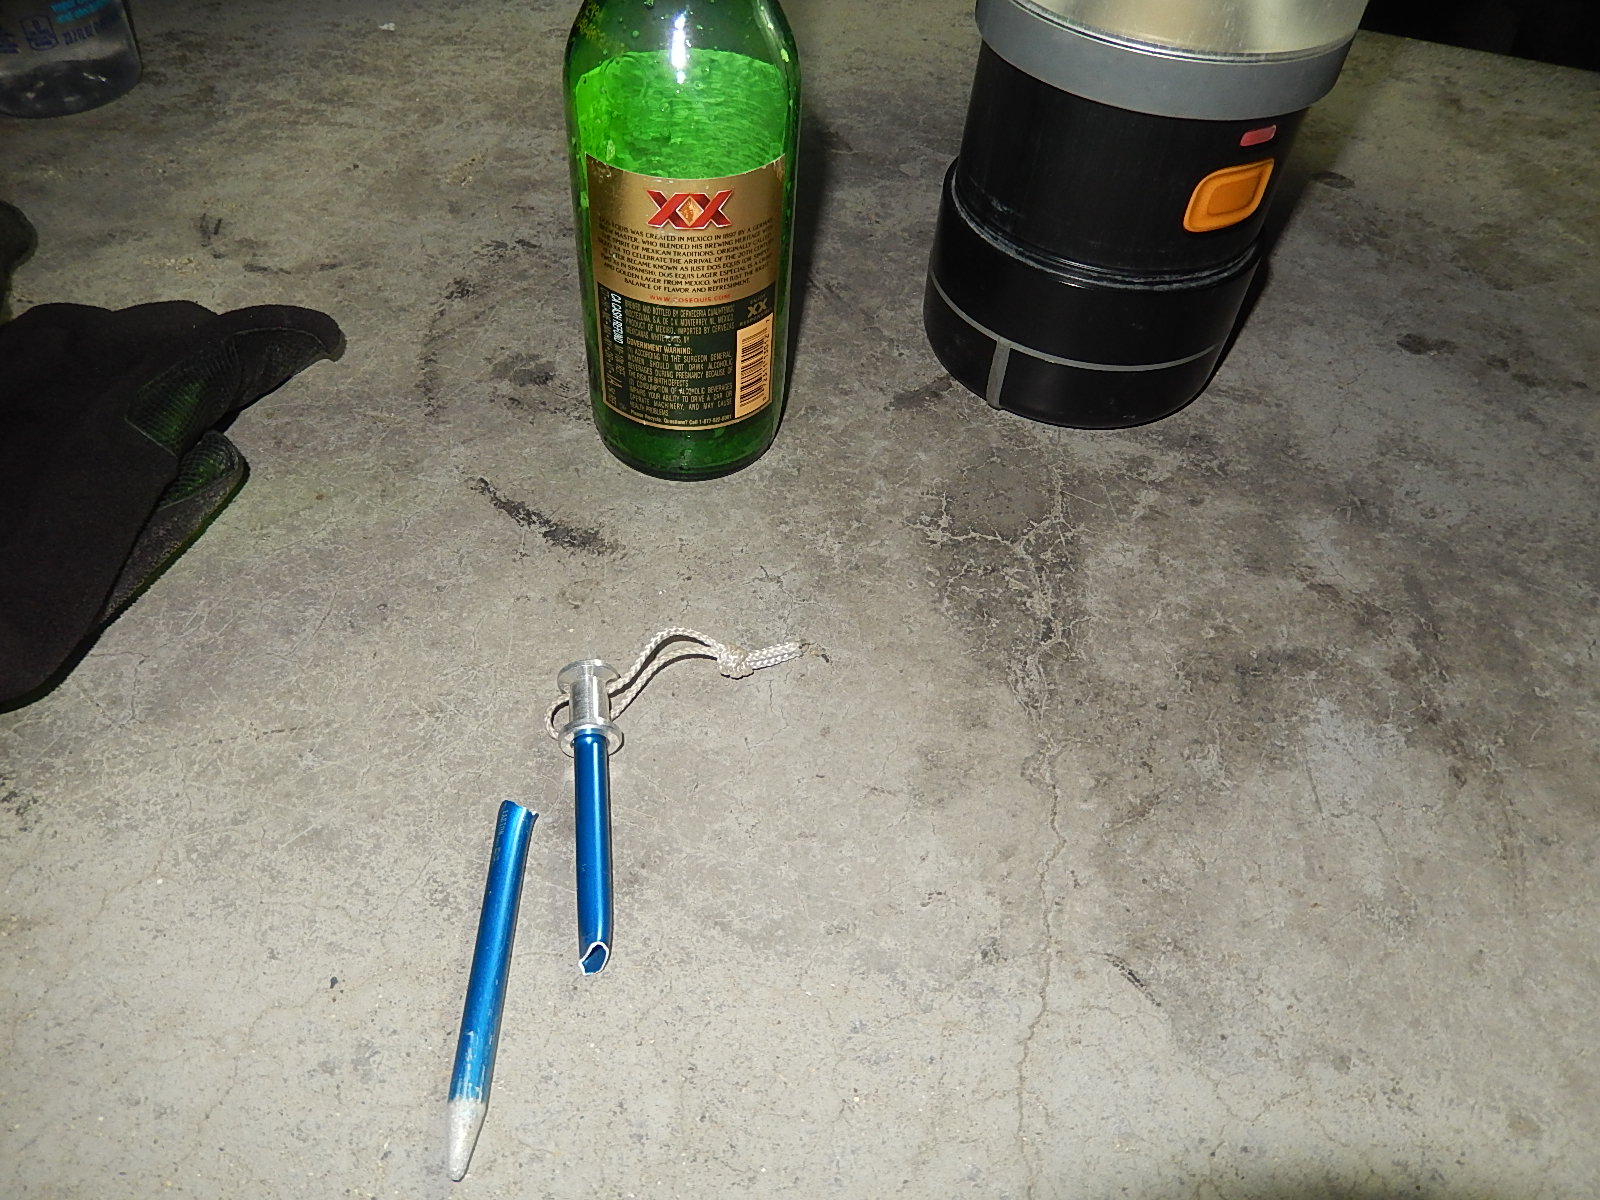
Managed to break a tubular tarp stake. I rarely use them unless car camping, prefer MSR Mini-Groundhogs/titanium skewers/MSR Carbon /Cores for backpacking.
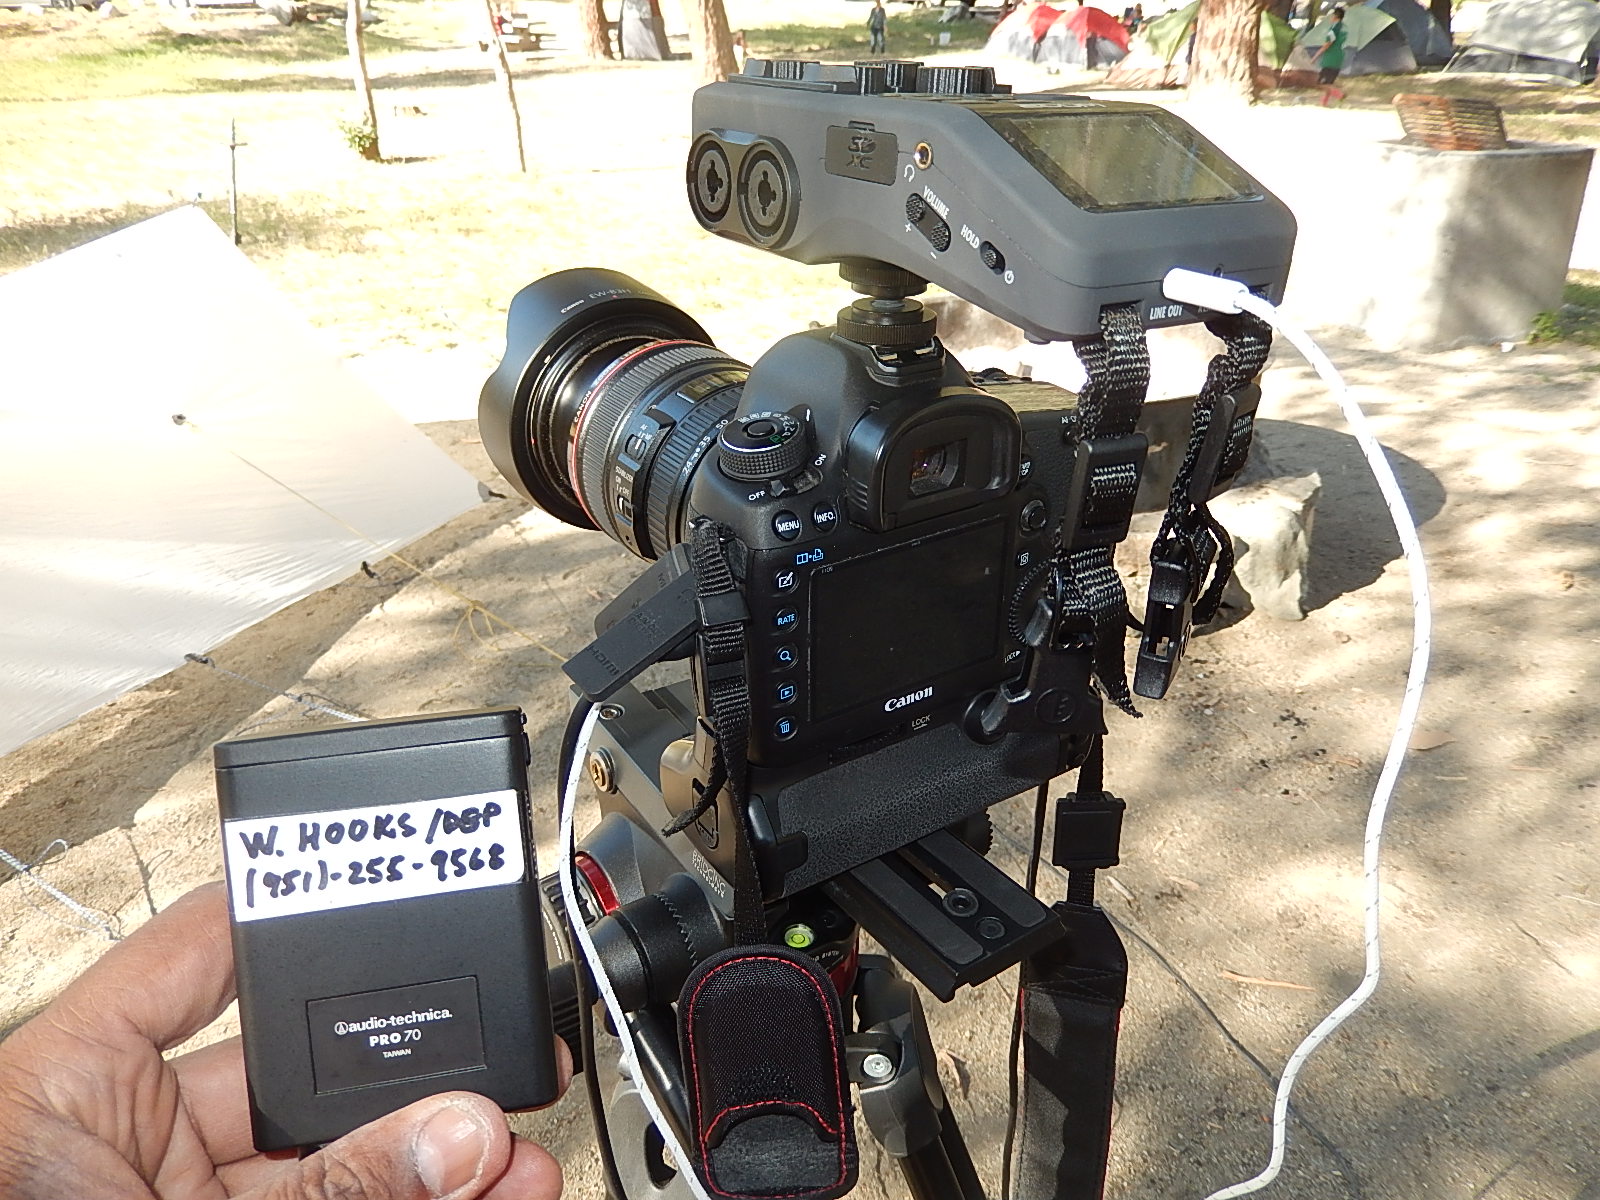
Enjoyed getting some field video refinements finished.

Spent a wonderful cool sunny day in the park, hiking a portion of the Ryan Mountain Trail then camping with 2 new friends: Tom and Mo Holmes from northern CA. They are in Aptos, just south of Santa Cruz, and I plan to visit them next week during my road trip north.
I’m trying to adjust to the loss of my father and have been fortunate to have help from so many. To all of you: my gratitude.
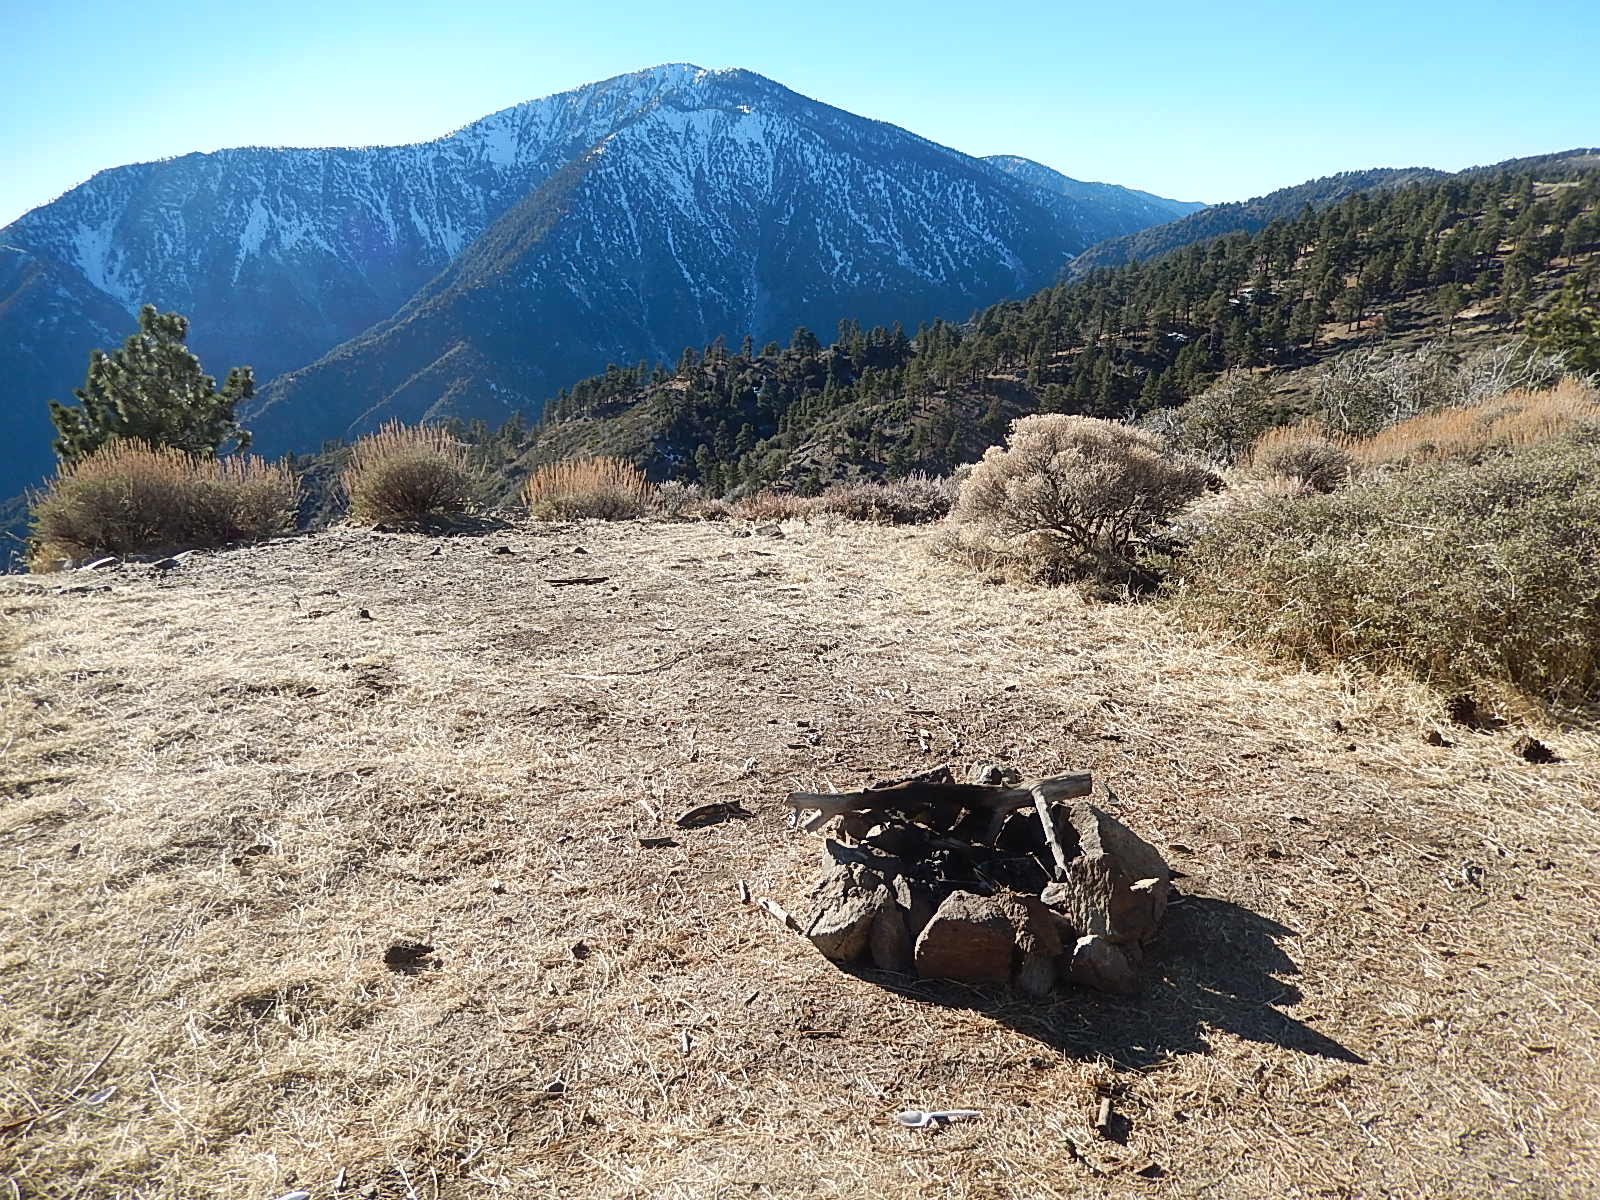
 I passed a fire ring someone set up, east of Inspiration Point and decided to cook with dead wood in the shade of pines, at 7300 ft elevation in the local mountains west of Wrightwood.
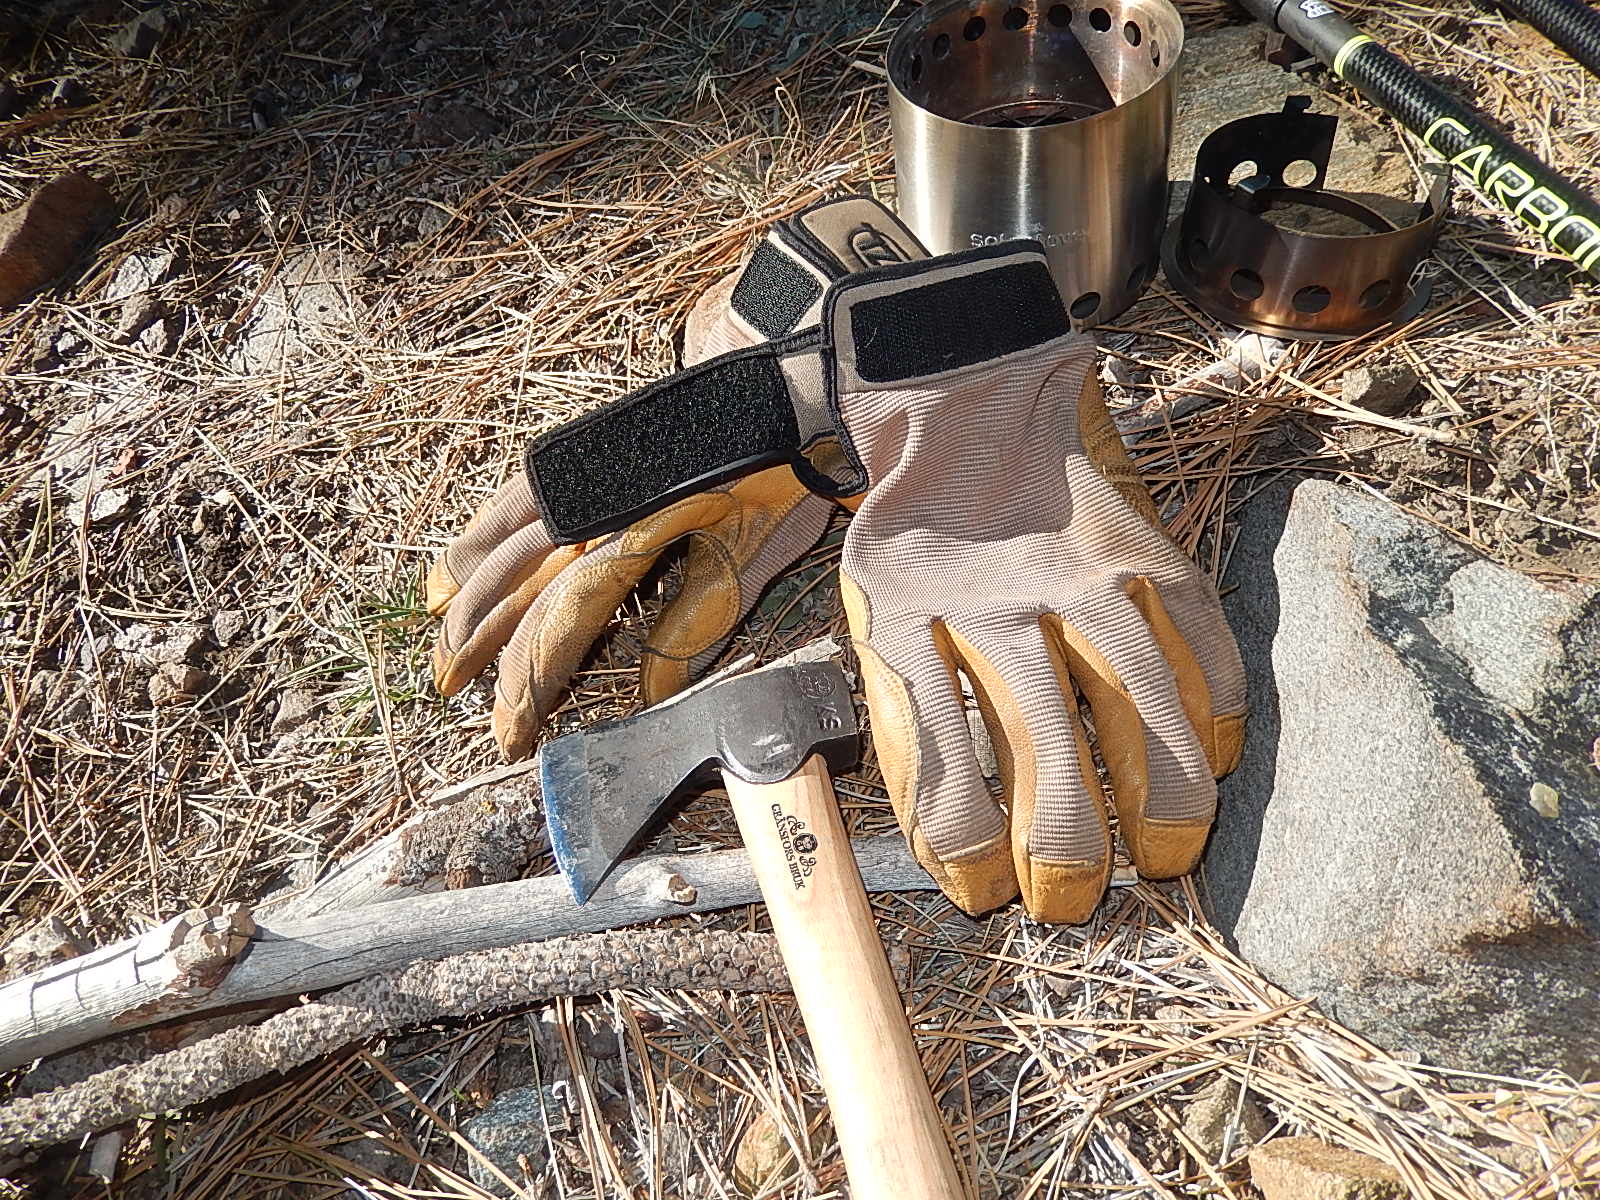
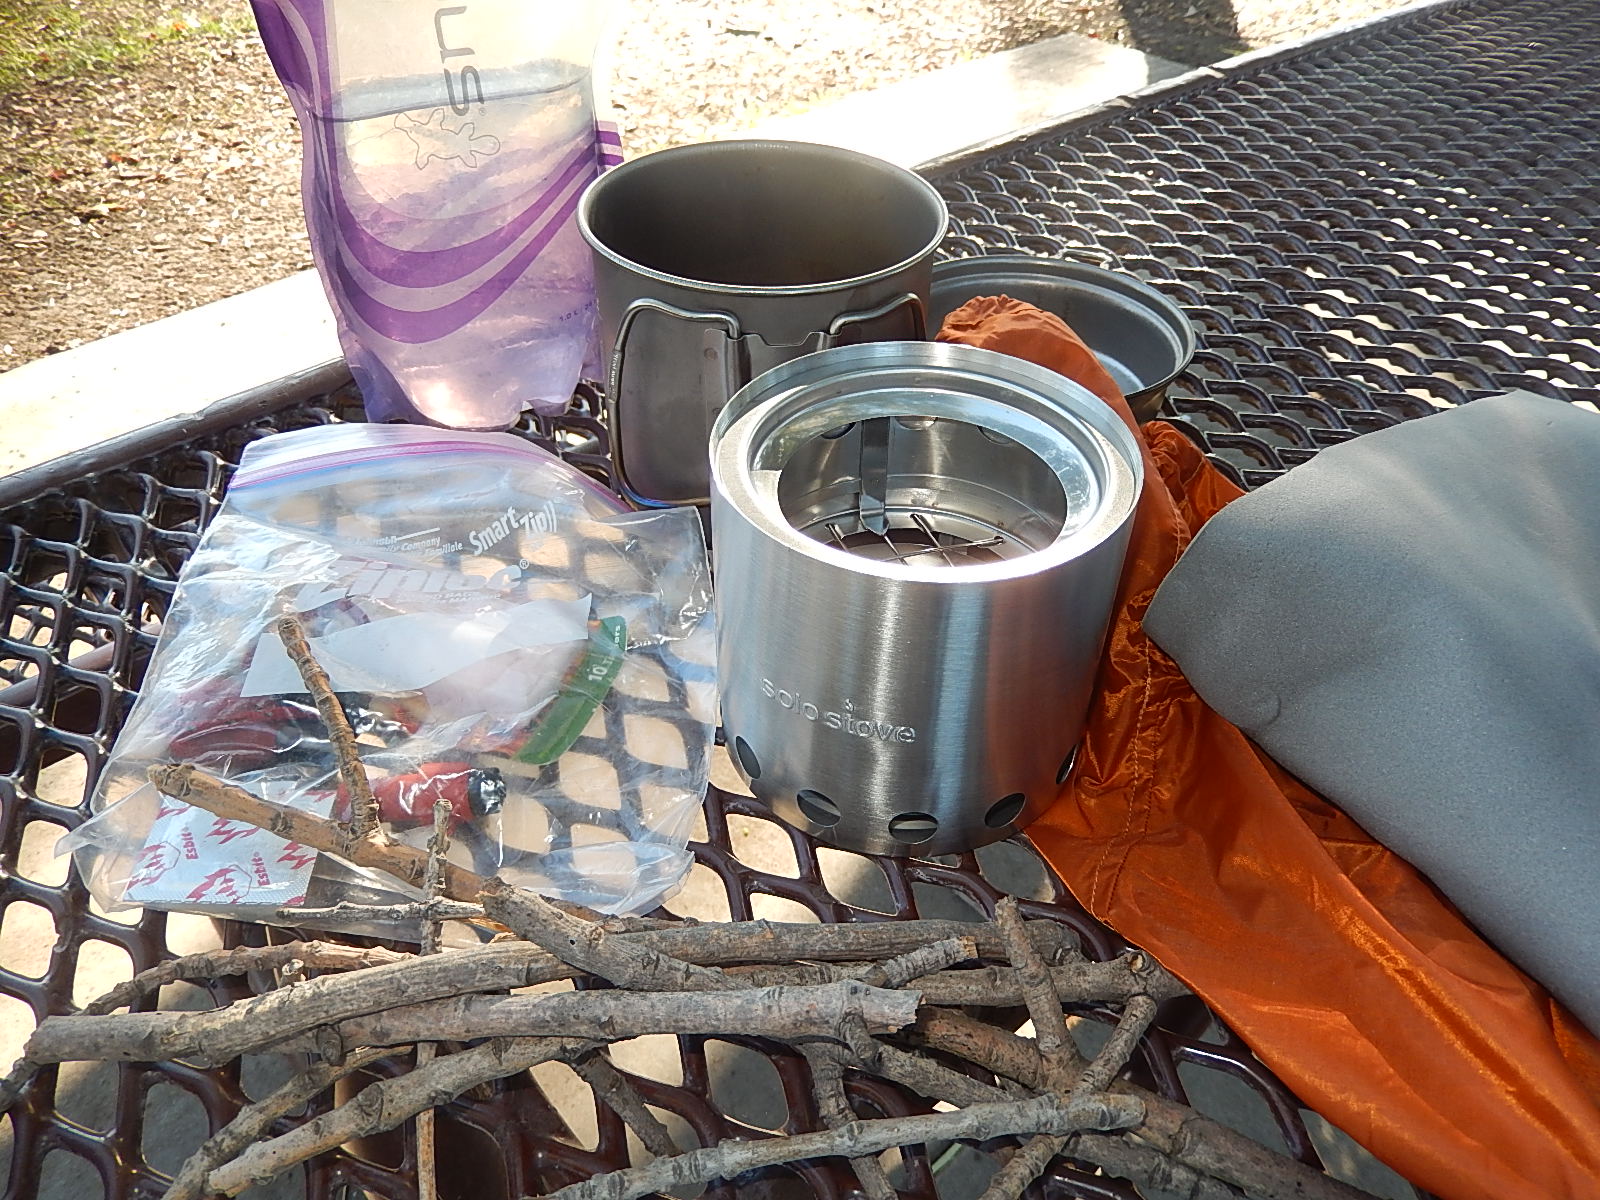
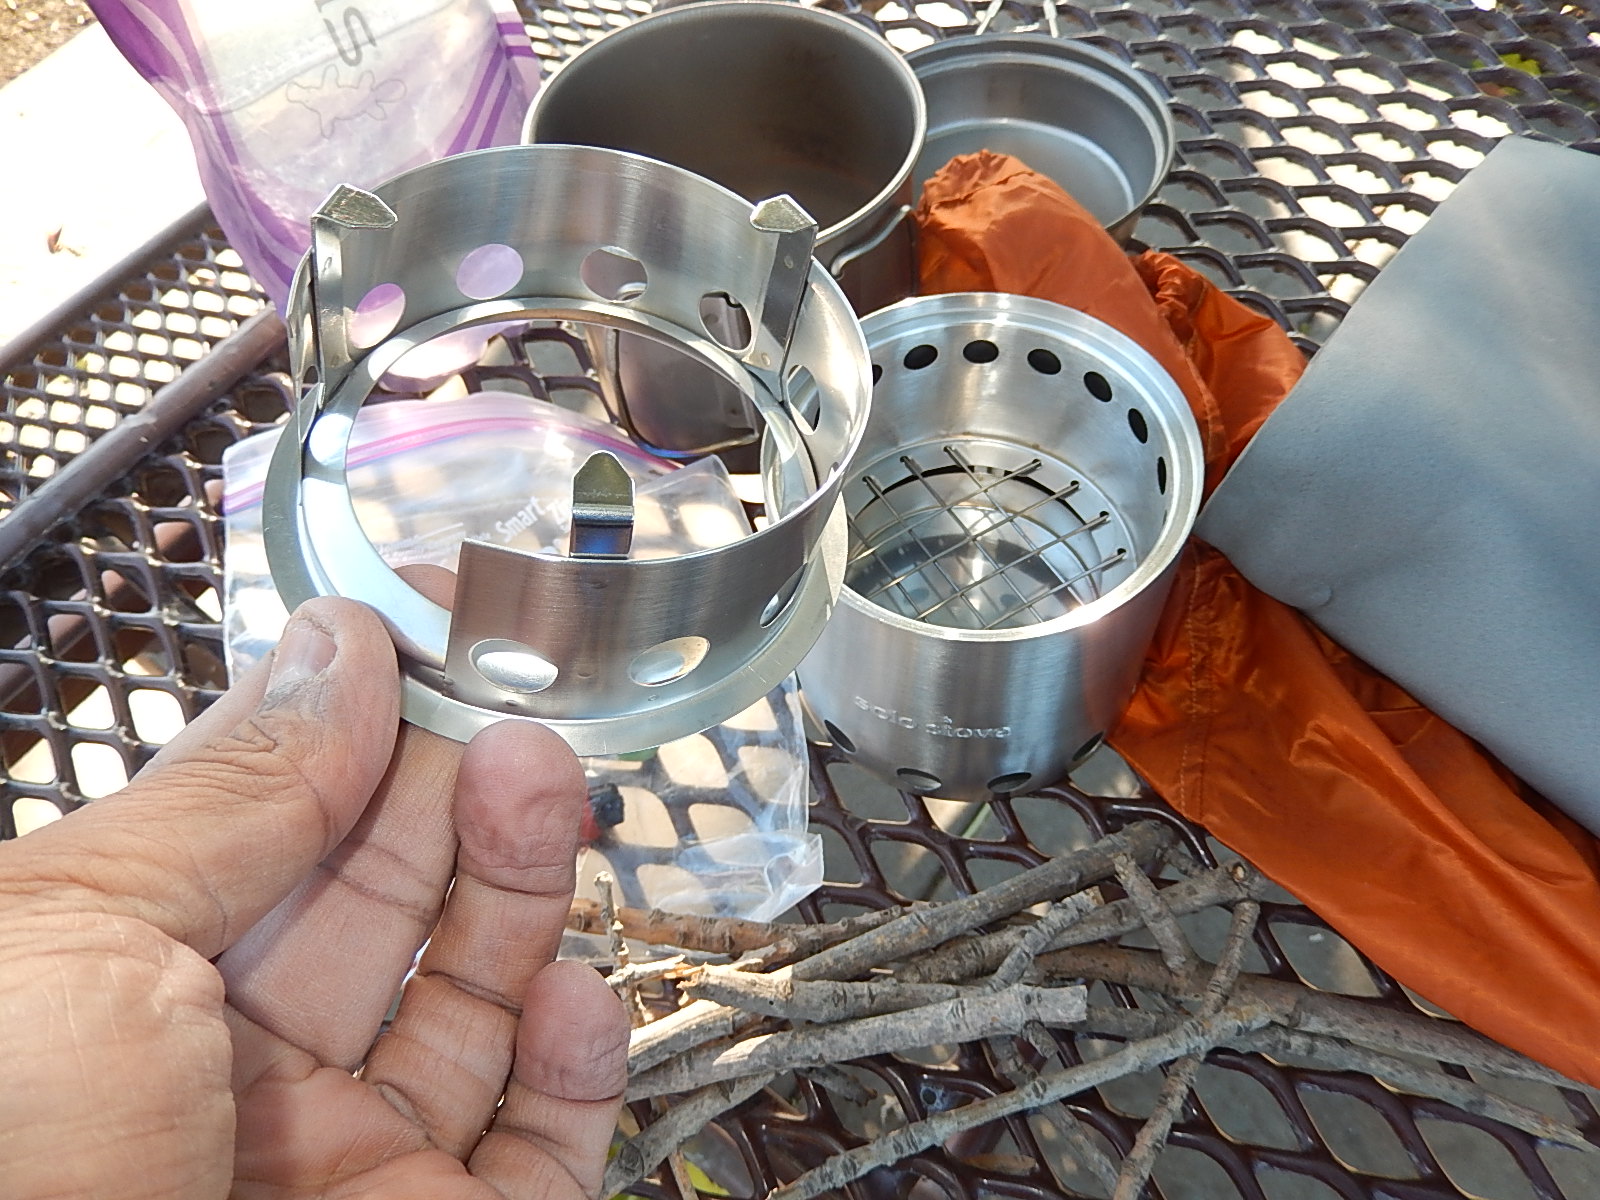
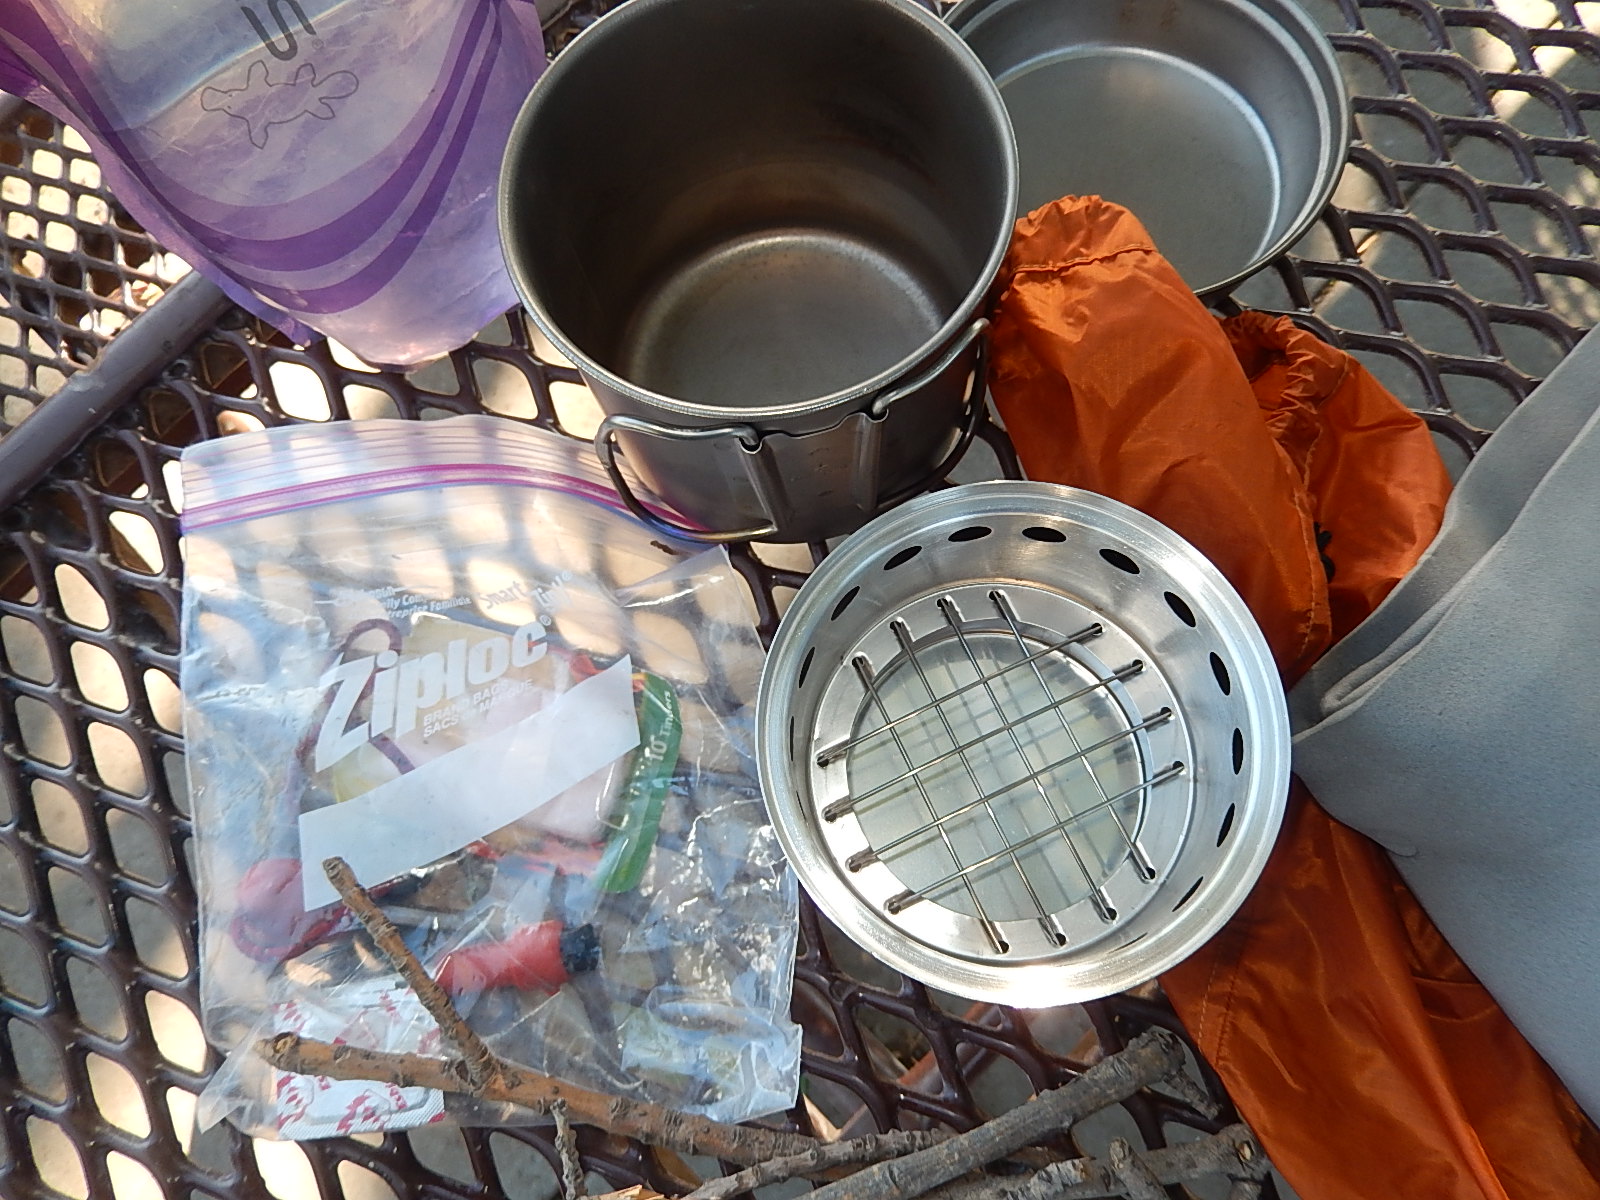
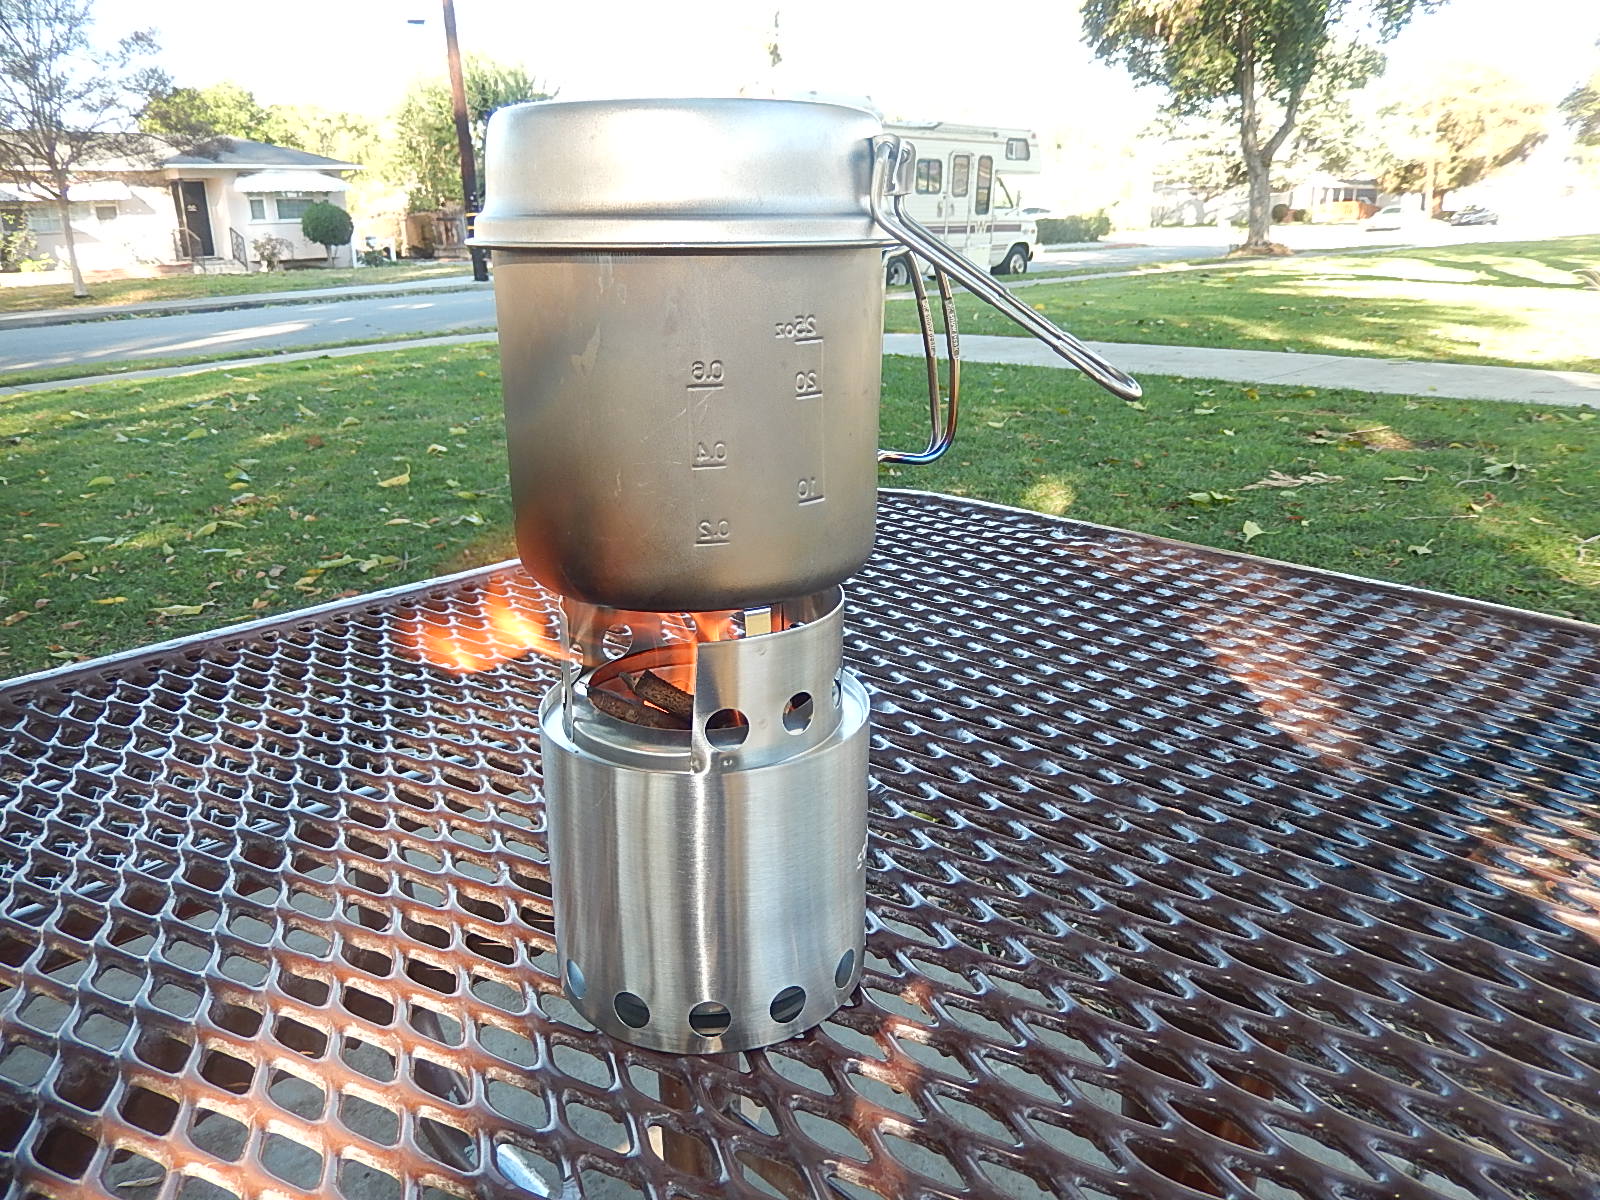
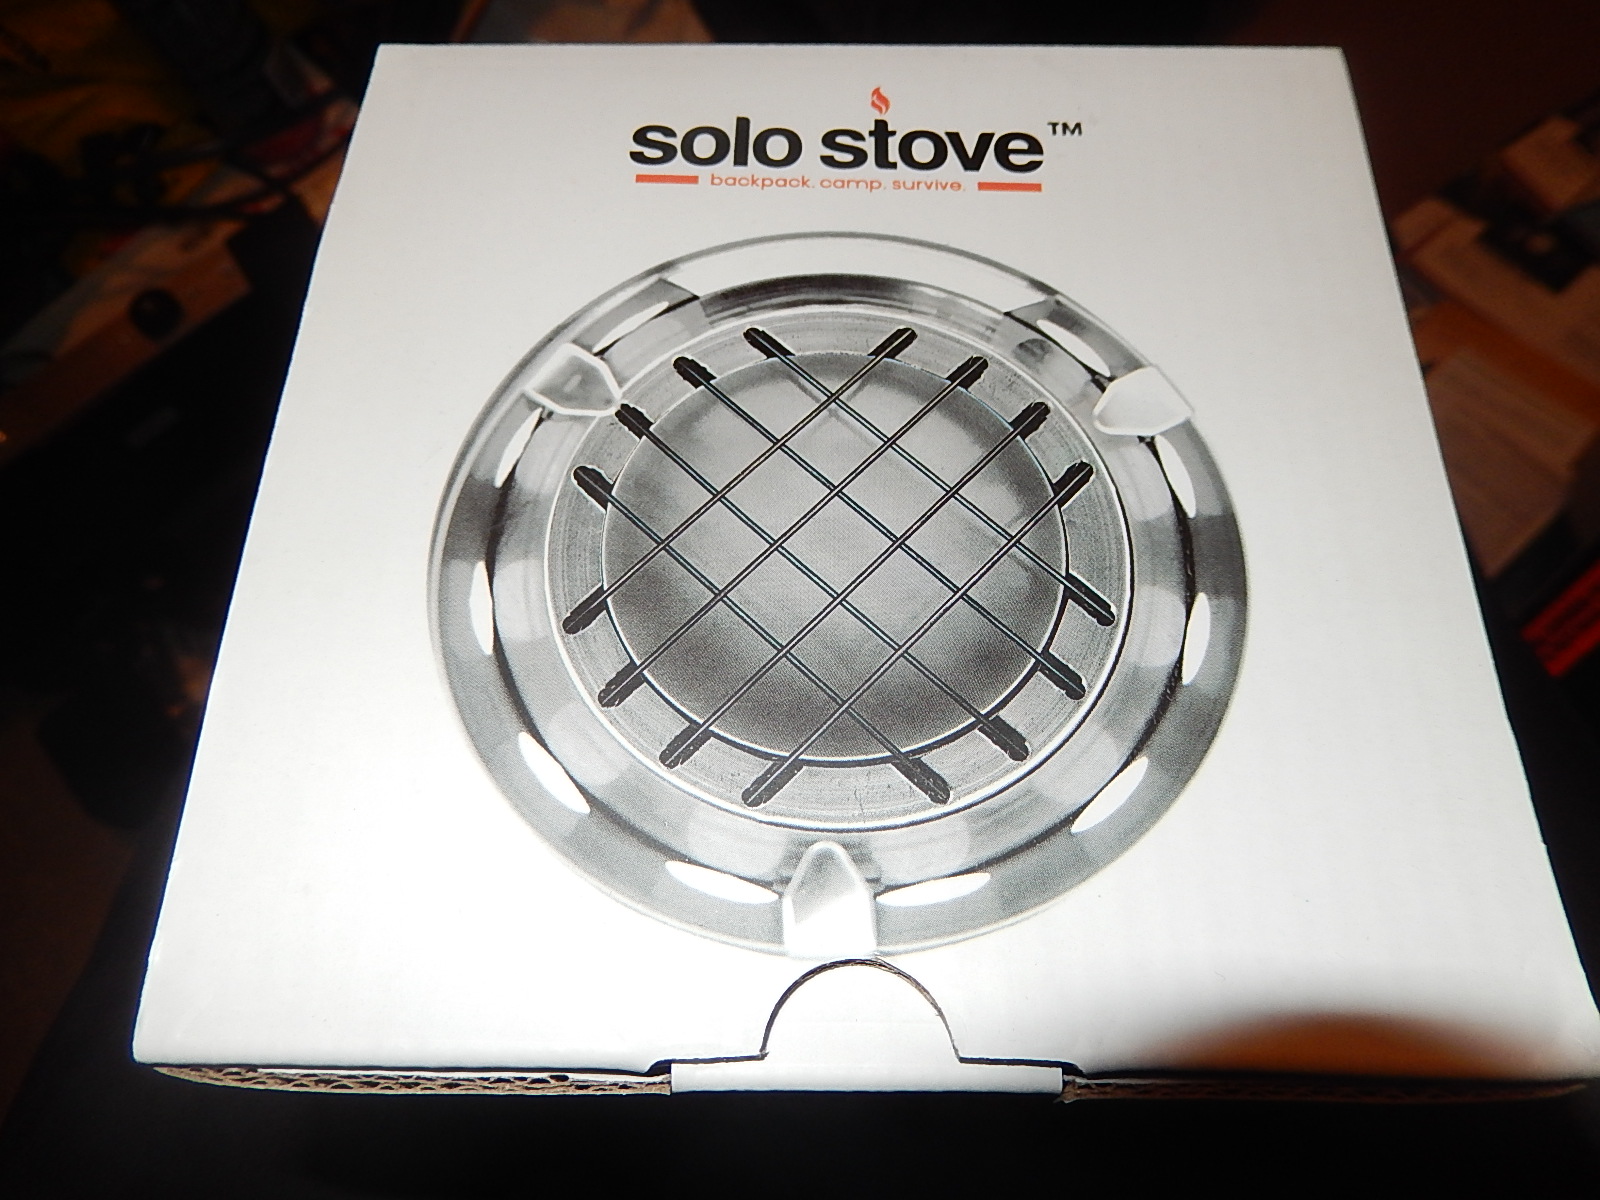
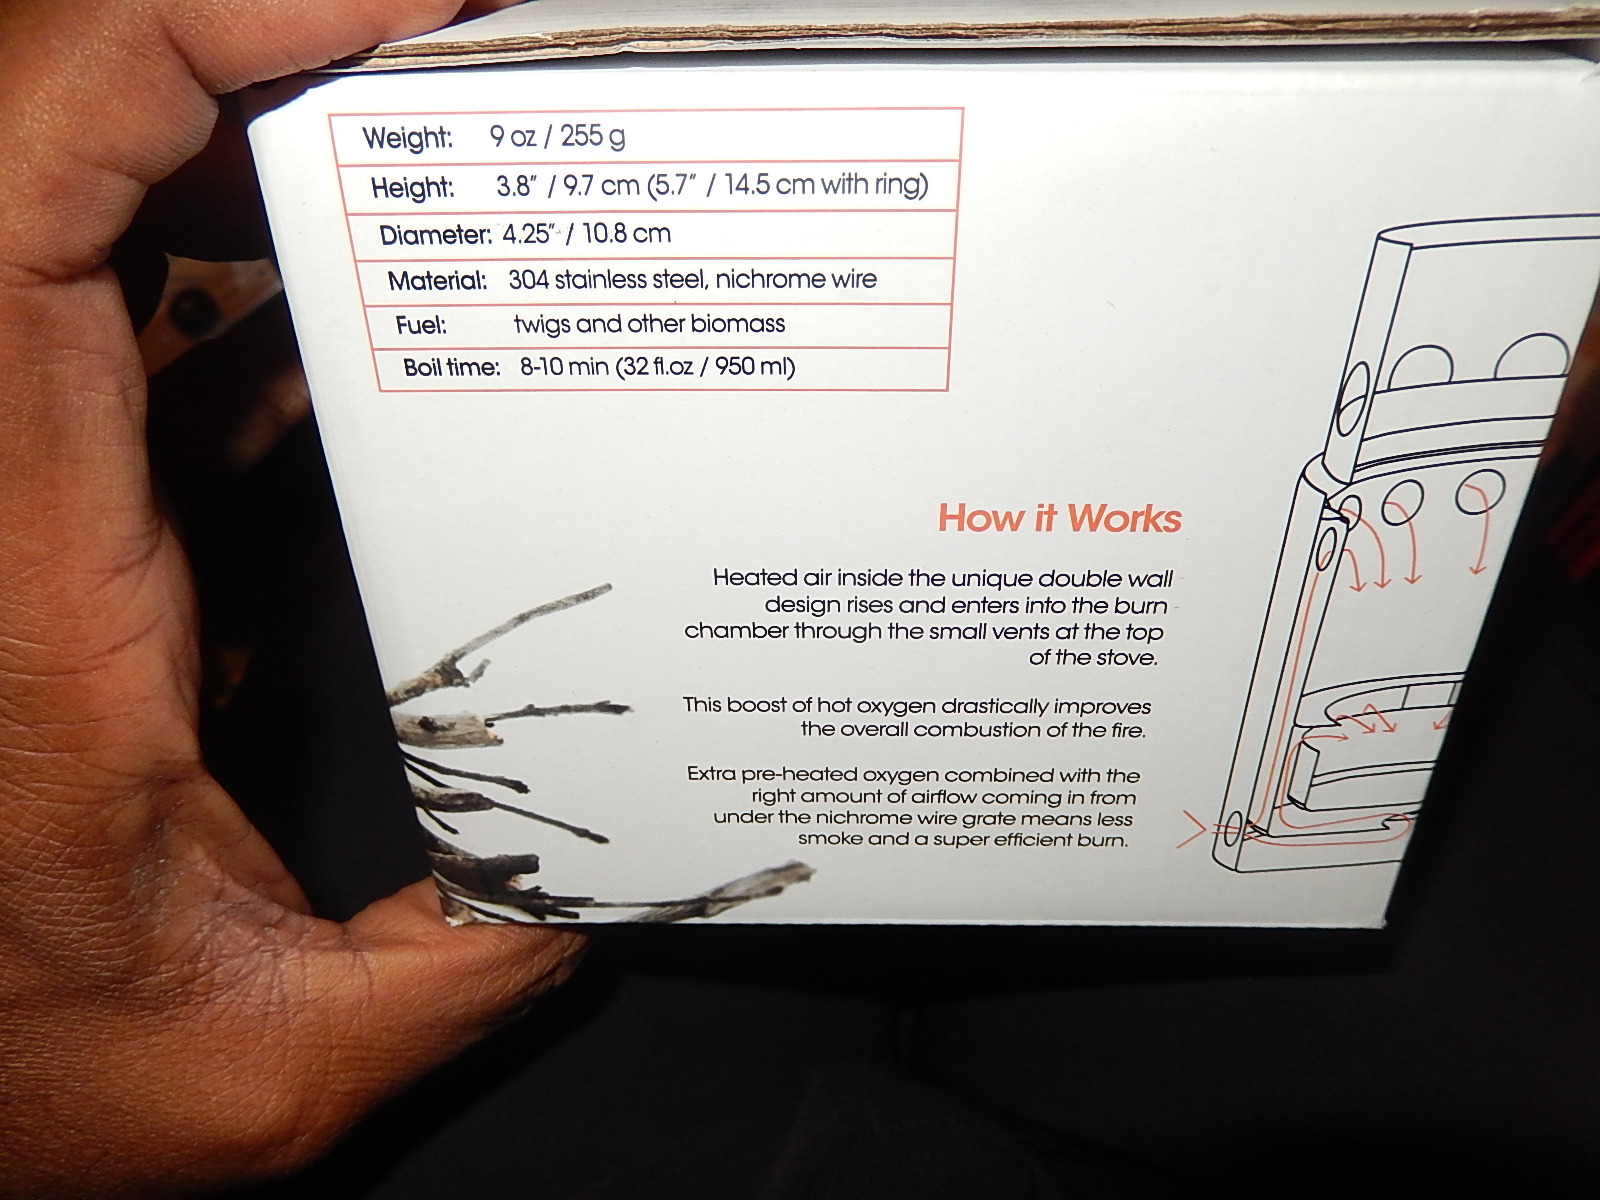
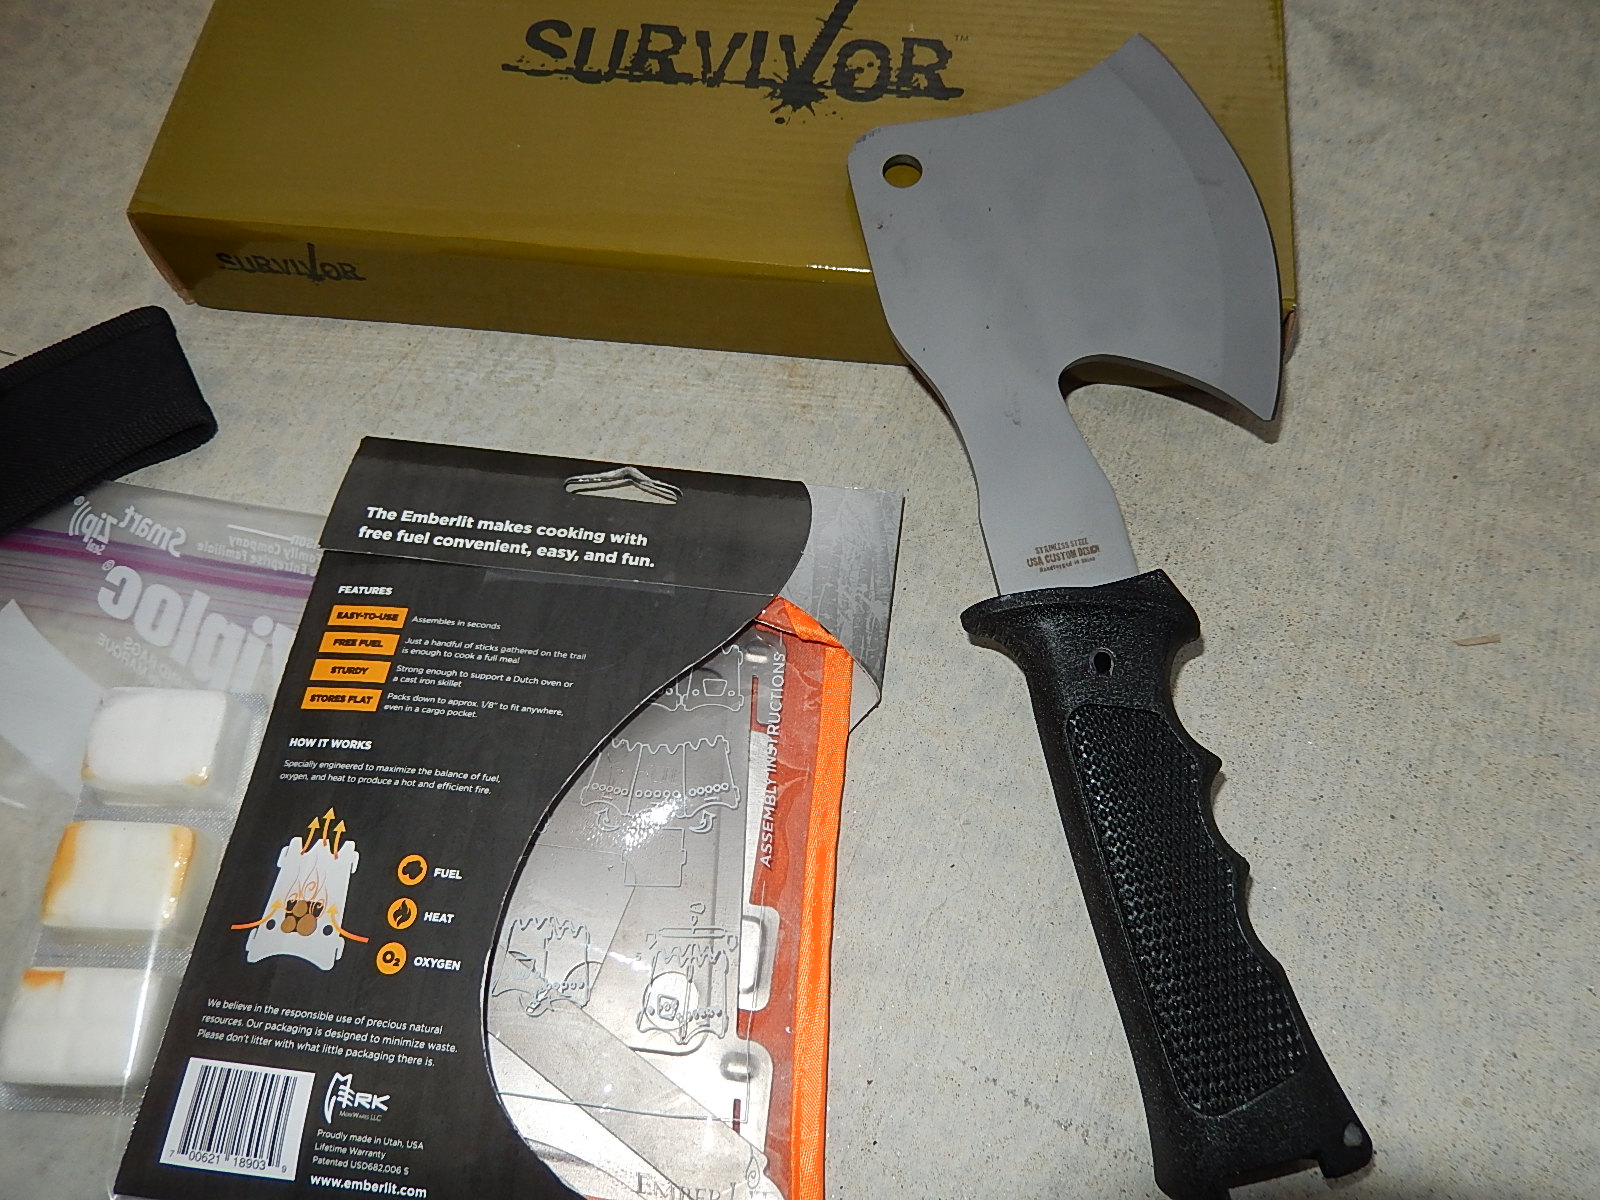
I guess you could say that I found the right wood (heh), as the fire was very easy to start and maintain after processing some limbs with the GB Mini hatchet (12 oz). I really like the Solo Stove: simple, light, hot, efficient using very little wood, easy to dispense with coals and ash. I carry no fuel with me.
Some operating tips:
-Do not overload the stove with large pieces of wood. I recommend 3-5mm diameter twigs about 10 -12 cm in length and have somewhat larger-diameter wood available to sustain the fire, in the 6-10mm range.
-This stove is very hot to handle after use. I ‘ve had great success using Petzl Cordex leather belay/rappel gloves (which do dual use for climbing) in picking up the stove to empty the coals, as well as manipulating the Snowpeak 900ml pot which is normally used for cooking. One useful feature is that the stove base remains cool due to the design, also preventing scorching of the underlying support surface.
-My aluminum MSR stove windscreen works beautifully with the Solo and Emberlit biomass stoves, reducing heat loss and improving boil times in more adverse conditions.
– I typically use either a firesteel, lighter or match to light whatever selected tinder is available, whether natural or synthetic. My preference when speed is more important is to use Coghlan prefab tinder, finding that about 1/2 of a unit is enough for most purposes.
I like the Exotac FireRod and Swedish Light My Fire Scout v2 /Fireknife firesteels in particular; integrated rod into the handle of the knife is very useful and light, and the knife’s spine is specifially designed to be used with ferro rods. The ergonomics are excellent with the Swedish models and the larger rod diameters, especially with the Exotac, are reassuring as I’ve fractured several smaller rods. To obtain the Exotacs as well as my GB Mini-hatchet, I contacted Oso Grande Knife & Tool Co. Sport Chalet and REI carry various Light My Fire items.

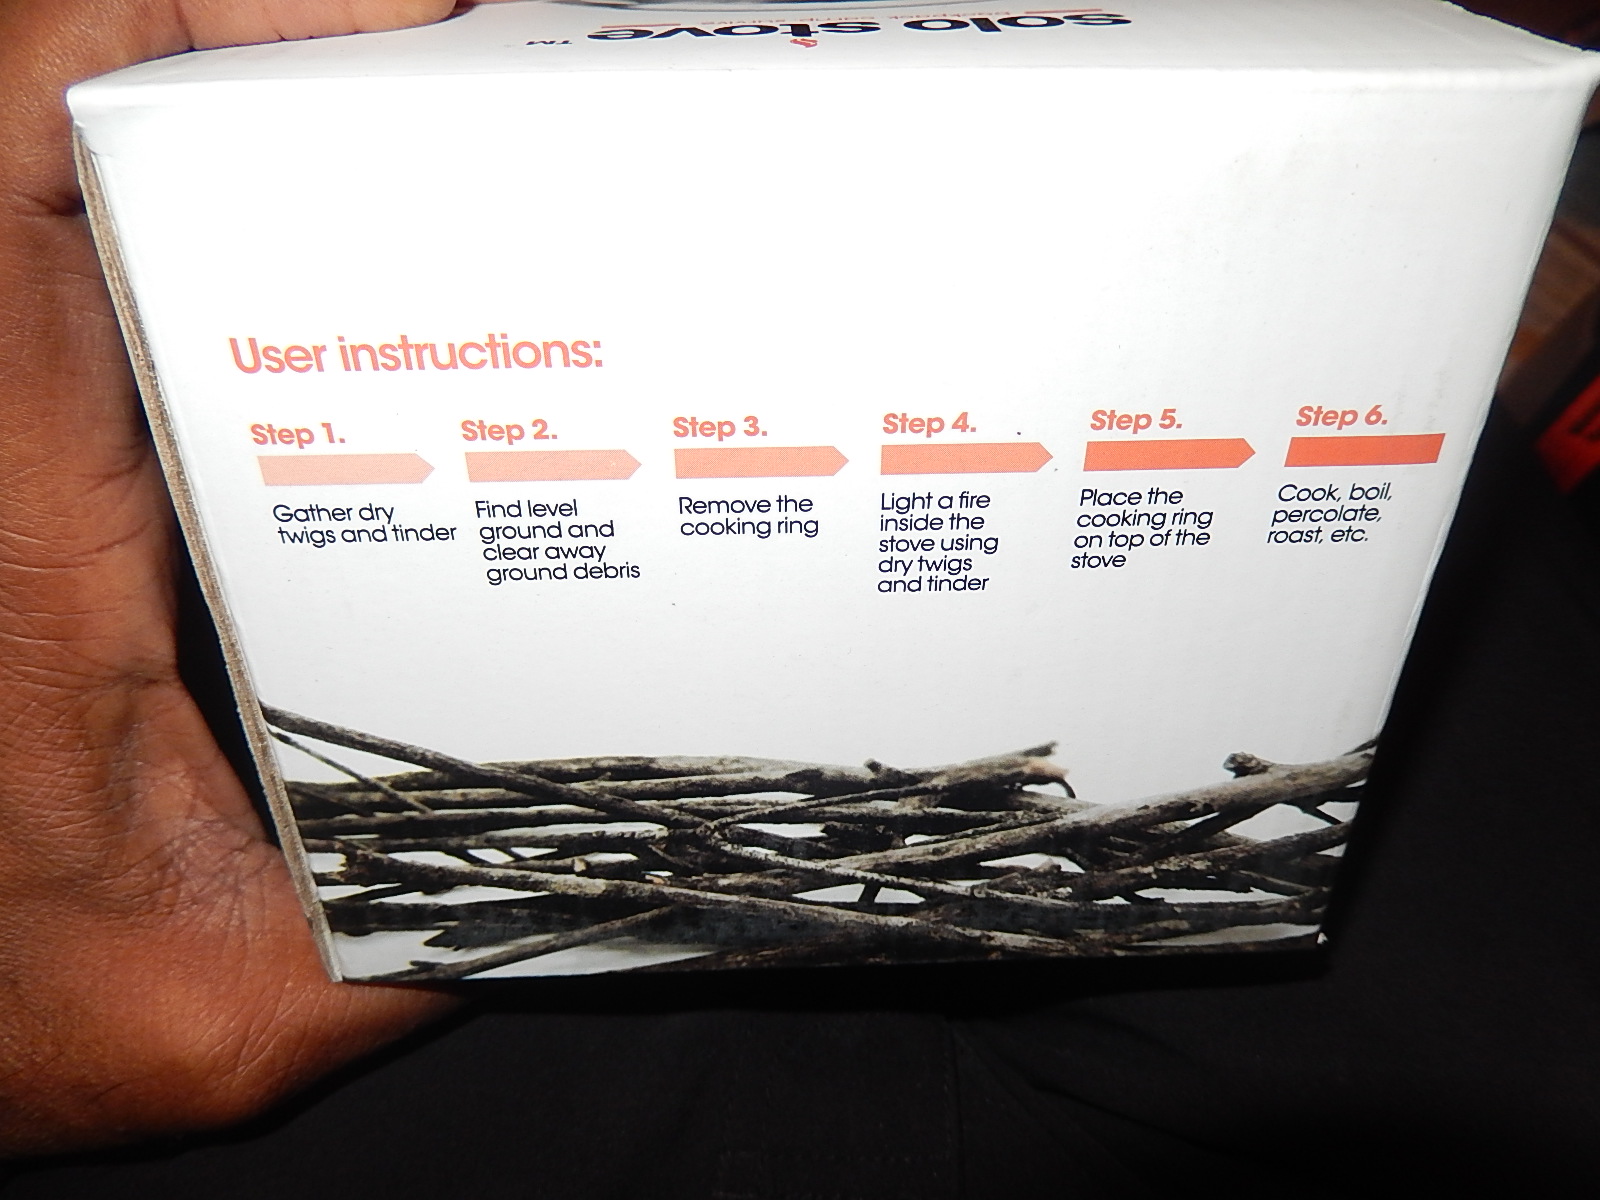
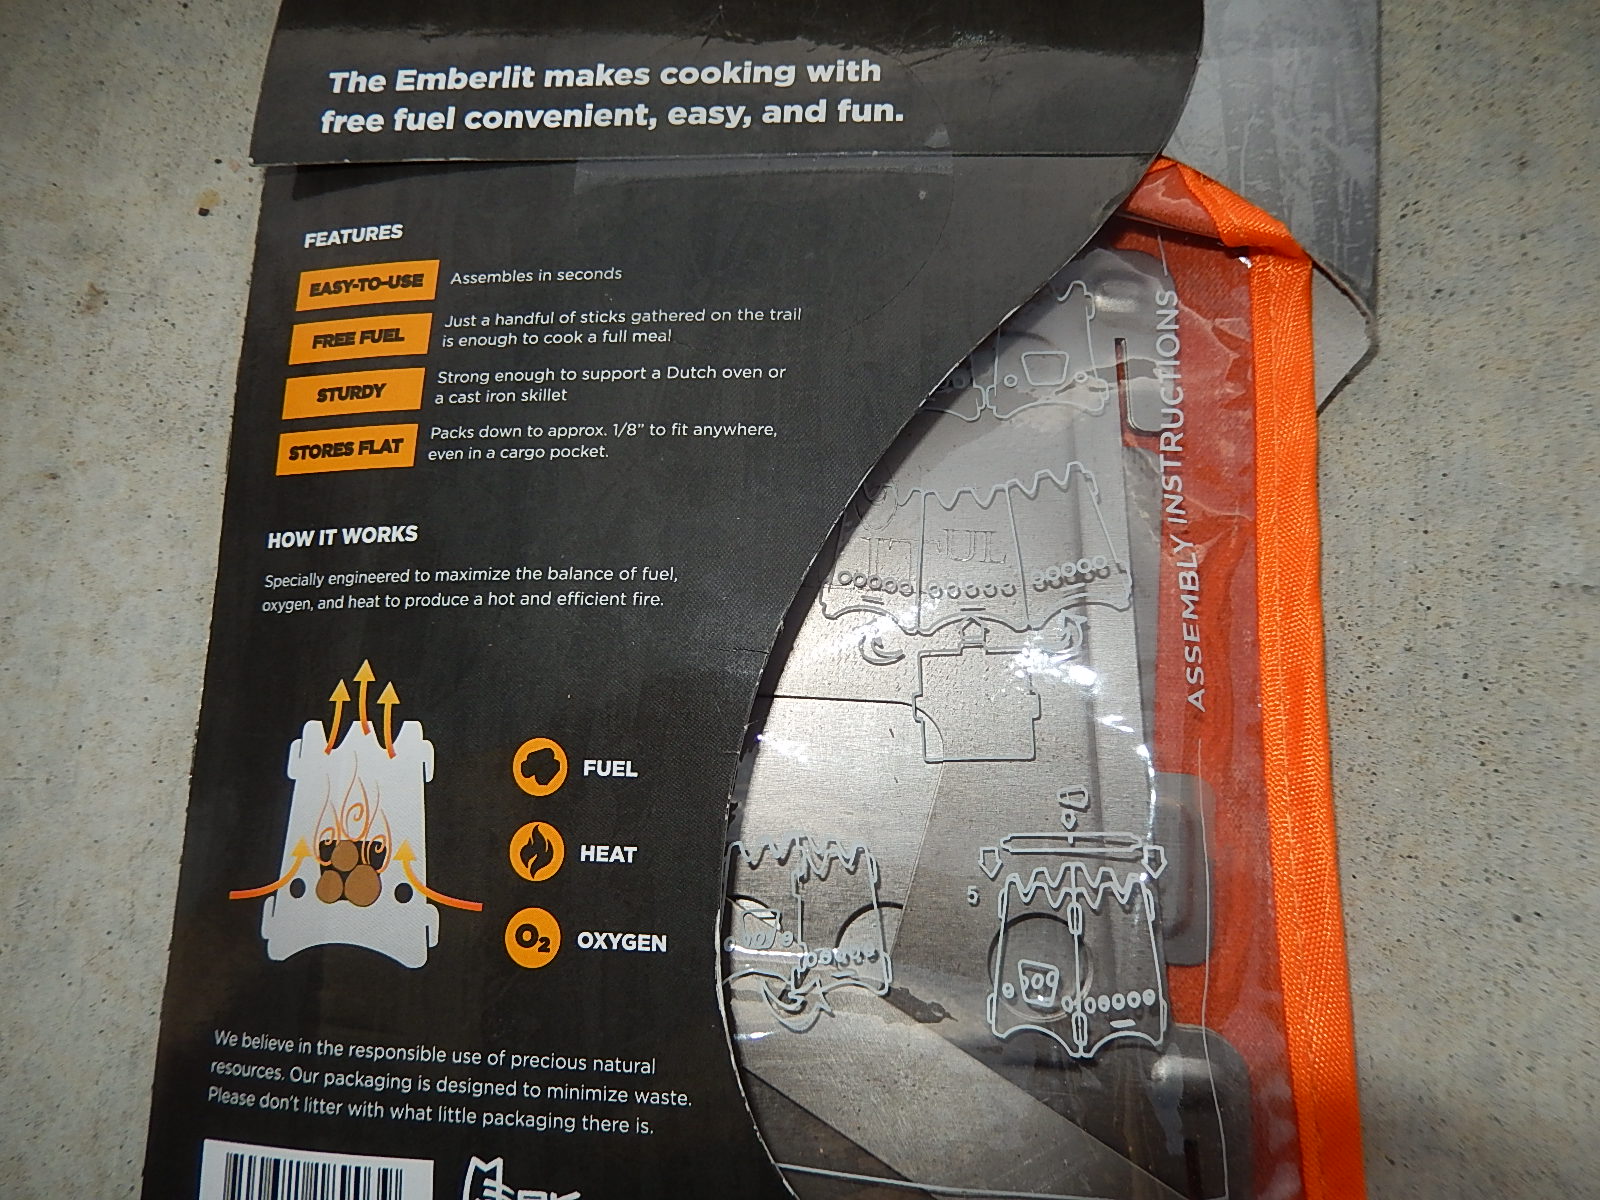
These 2 wood stoves feature completely different design concepts, but share some commonalities: first, they allow more controlled wood burning than open fires especially regarding the avoidance of stray embers and sparks; second, they’re hotter and reduce boil times in the right conditions; third, they increase burning efficiency with less fuel needed and less smoke produced. And after all: I’m a lifelong non-smoker…..and I ‘m a Californian where special attention must be paid to fire safety.
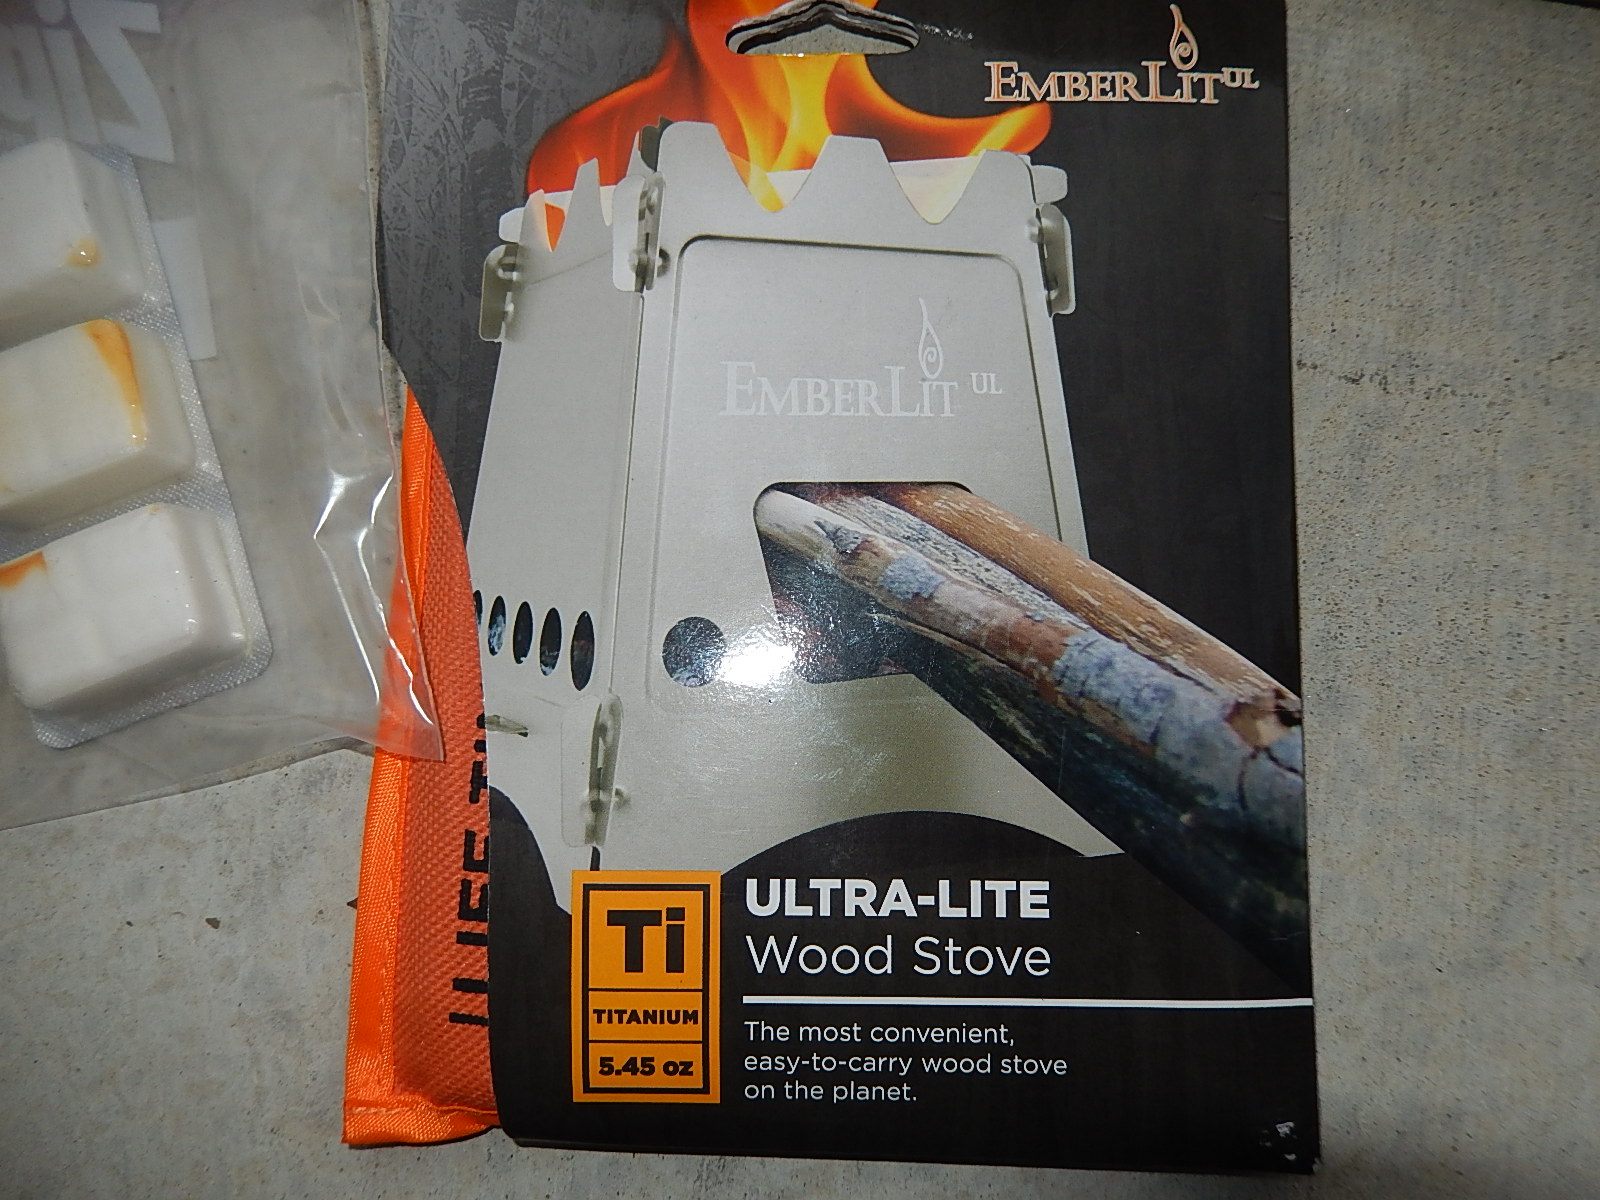
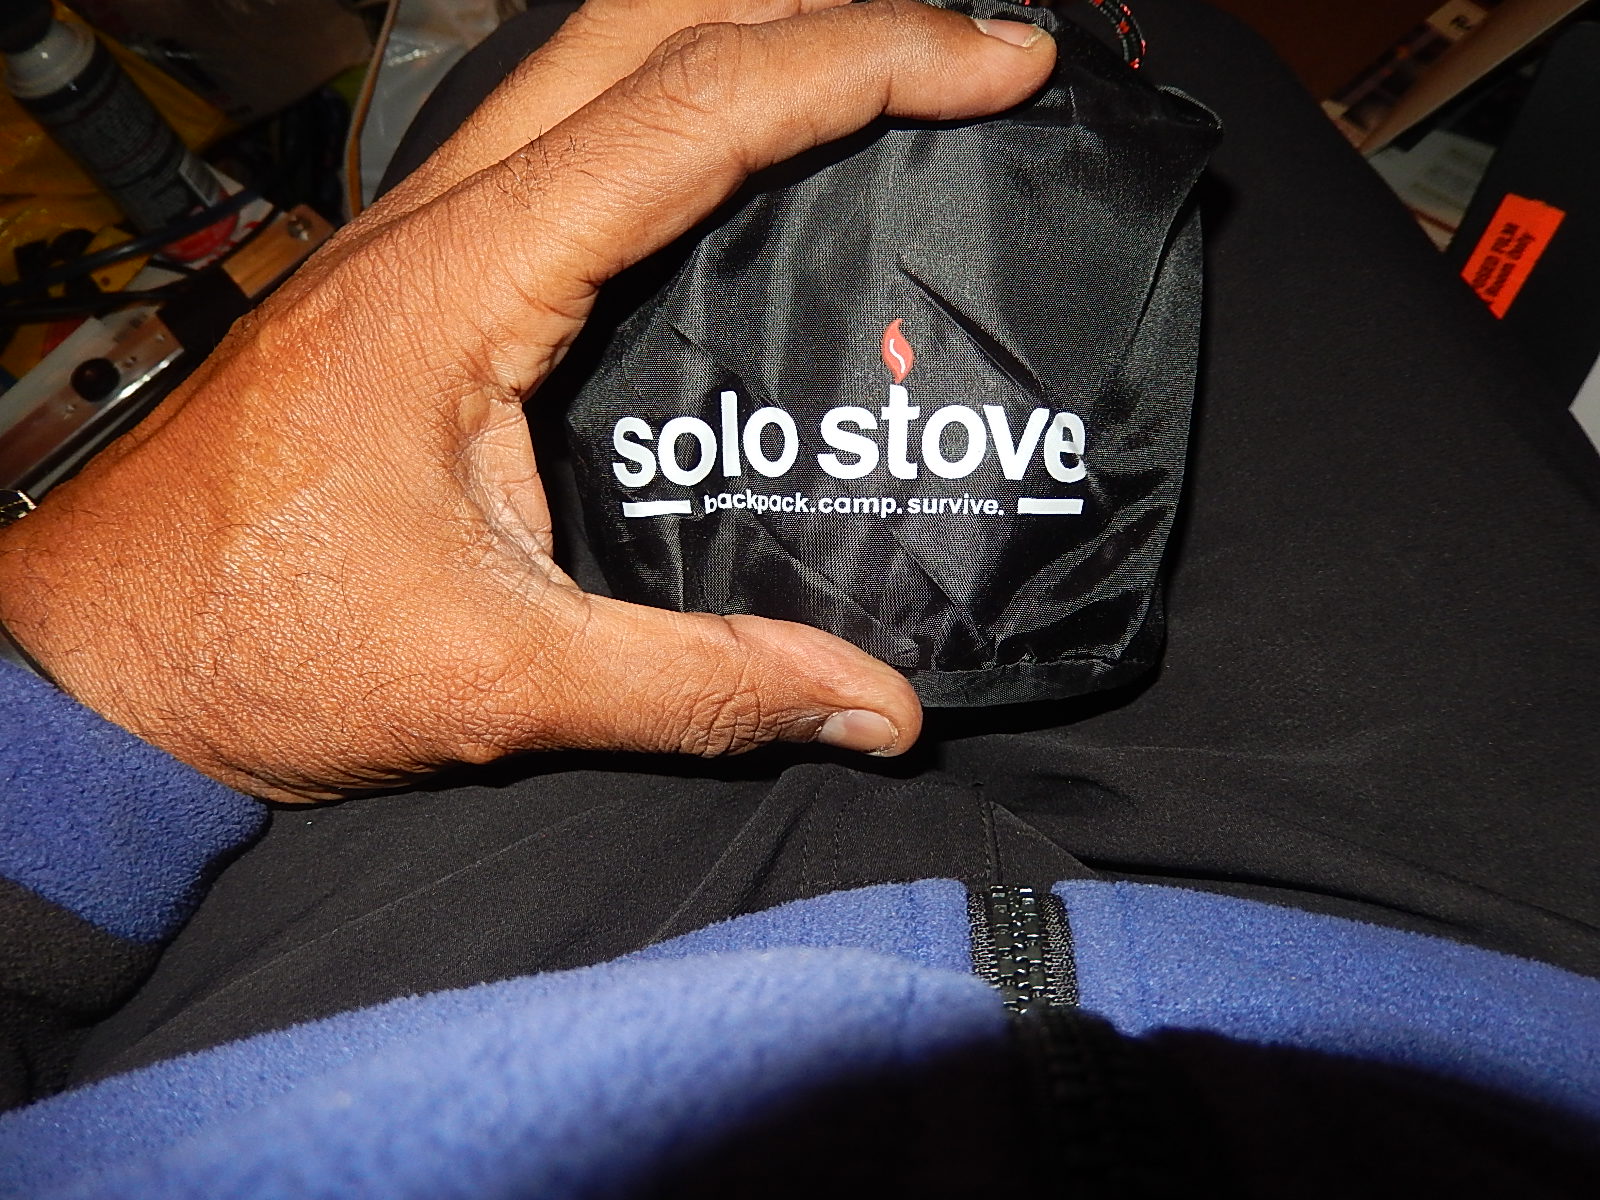
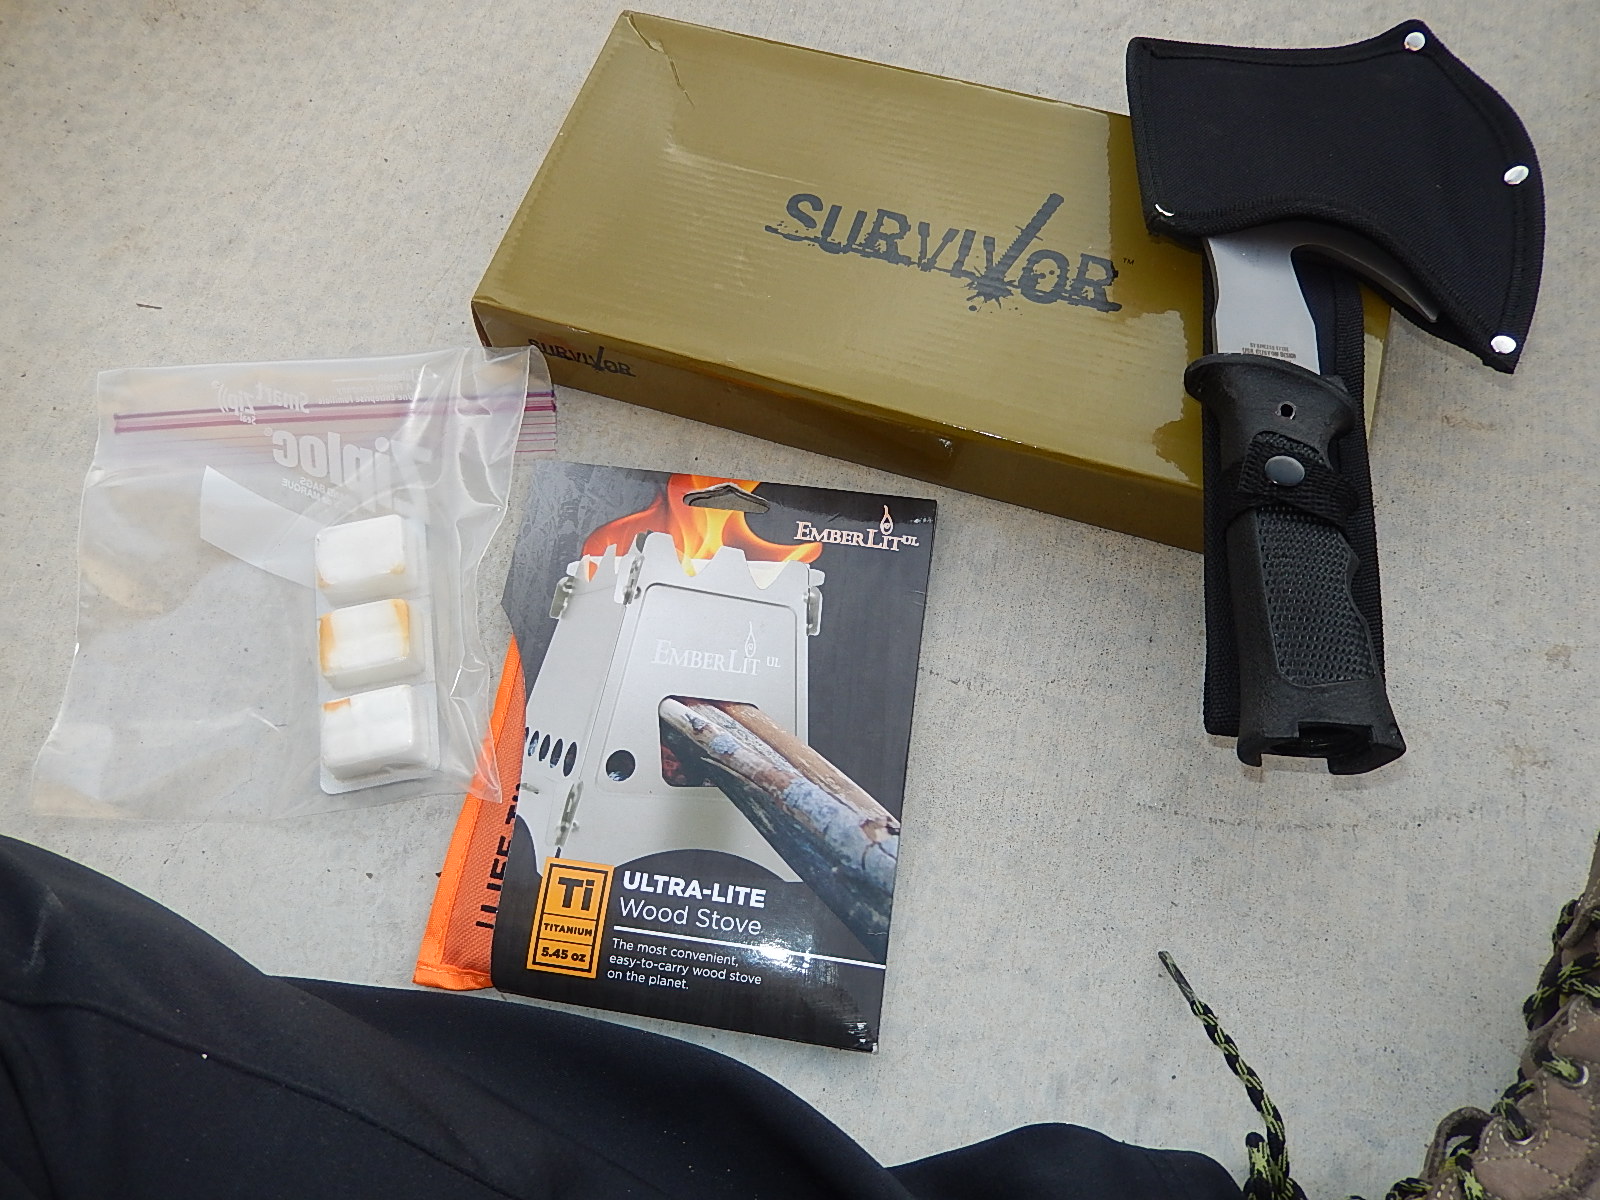
So no fuel needs to be carried; can’t run out of fuel (in the proper terrain); both store very compactly. The Emberlit is 5.4 oz and packs completely flat, the Sol is 9 oz and it fits into my cook pot needing no assembly.
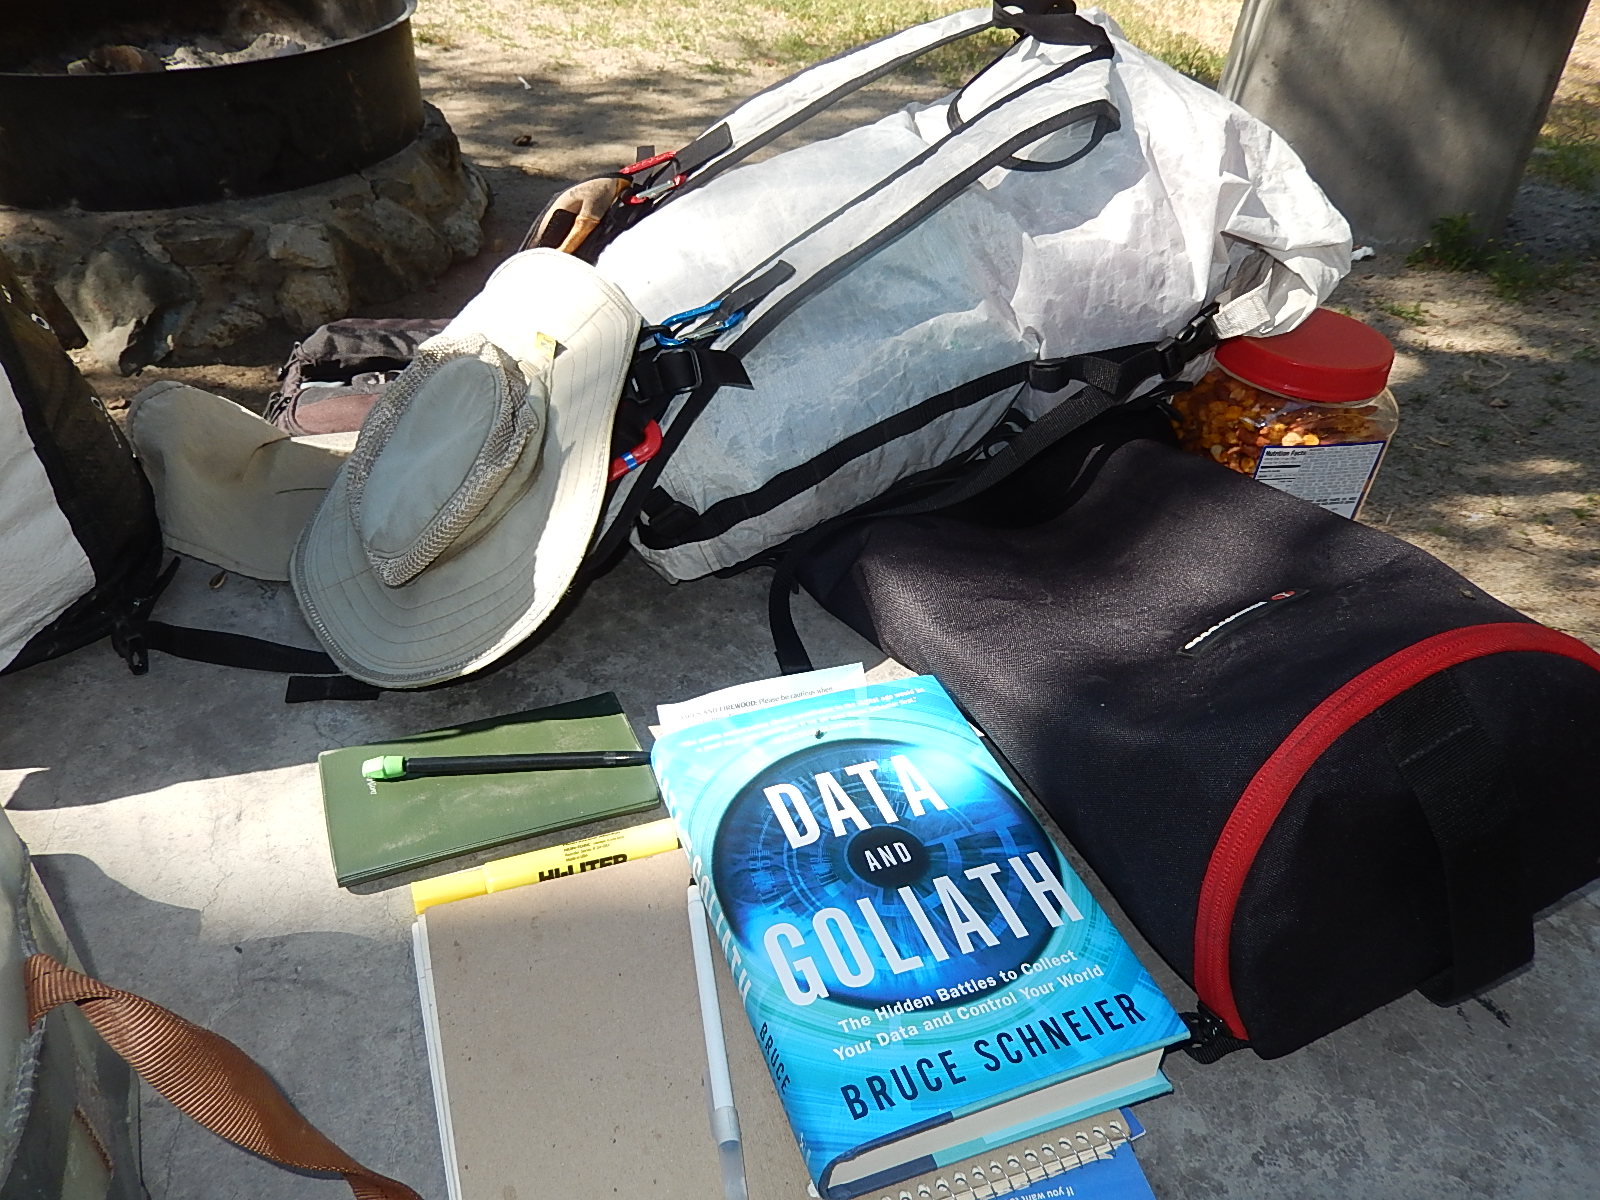
I’ve added the super ultralight (SUL) Hyperlite Mountain Gear Summit pack at 12.7 oz, with correspondingly light MSR Carbon Core /titanium skewer stakes for shelters.
My current pack for an overnight trip including water, food, and an alcohol stove system weighs about 10 pounds, so I wear my Nikon camera under one shoulder strap- pull out 2 trekking poles- and go. This setup will allow me to stay out to conditions of about 25 degrees F.
I’ve chosen the 17.5 oz M Tech Survivor hatchet and the Utah-made, Emberlit Ultralight titanium stove to begin burning wood for fuel in selected, legal areas. No plans to use these to any extent in southern CA where fire risk is usually so high, unless restricted to particular situations where I feel very confident that risk can be managed.
These are paired with a True Temper axe sharpener and Petzl leather belay/rappel gloves, encouraging safety using the hatchet and avoiding burns while handling stoves and cookware.
Why do it at all?
First- it’s a skill I find to be fundamental (as in emergencies) and valuable.
Second- free, virtually unlimited, ‘green’ fuel especially for longer trips.
Third- fun.

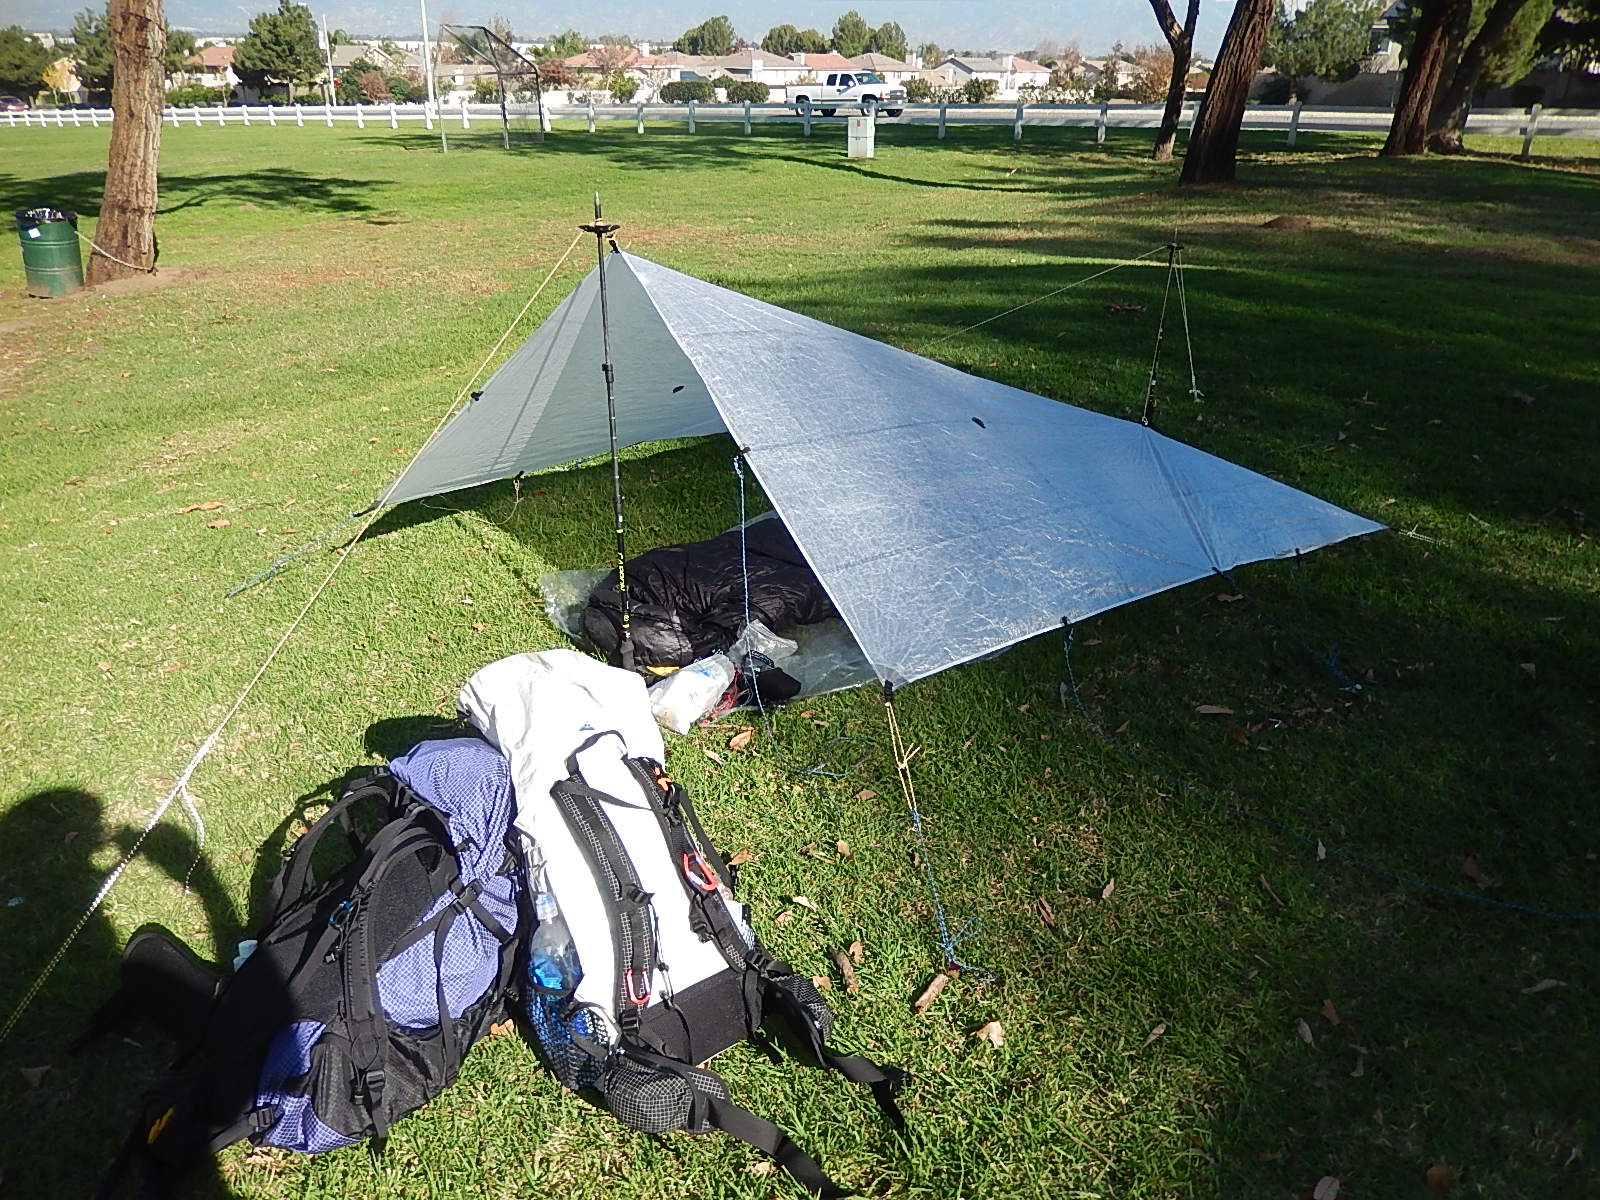
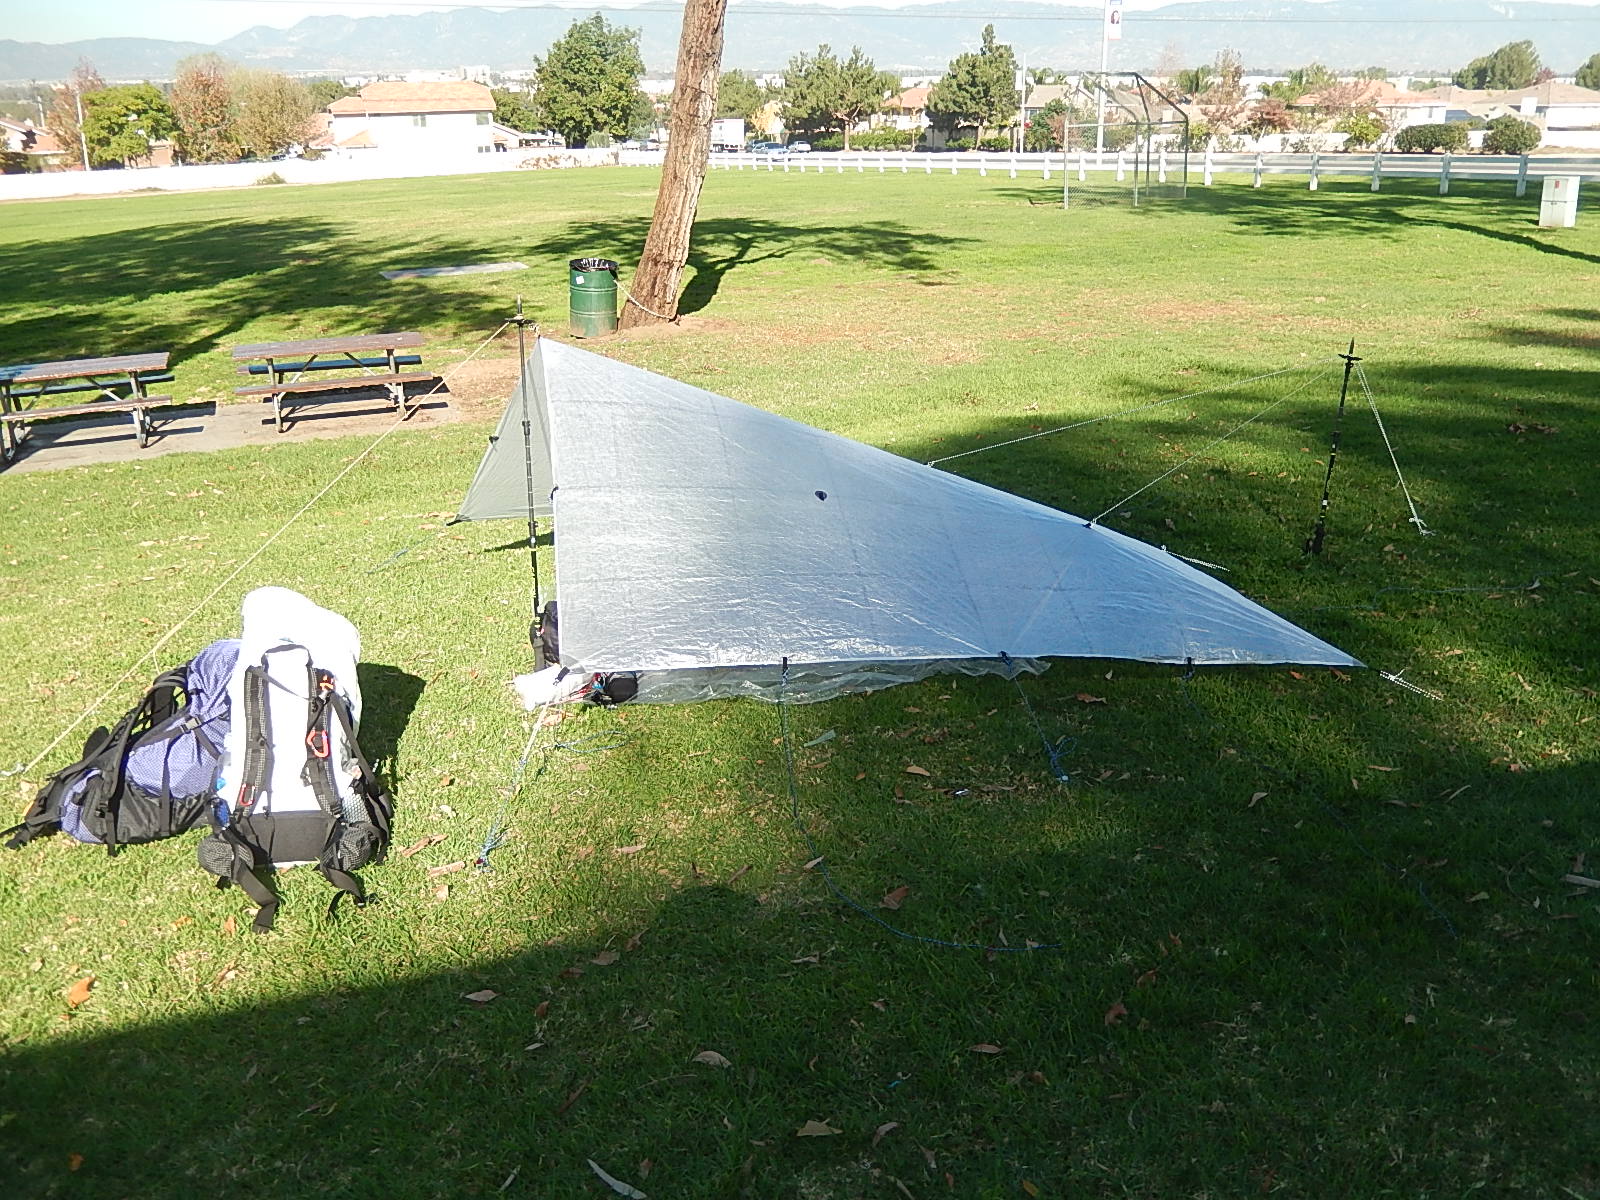

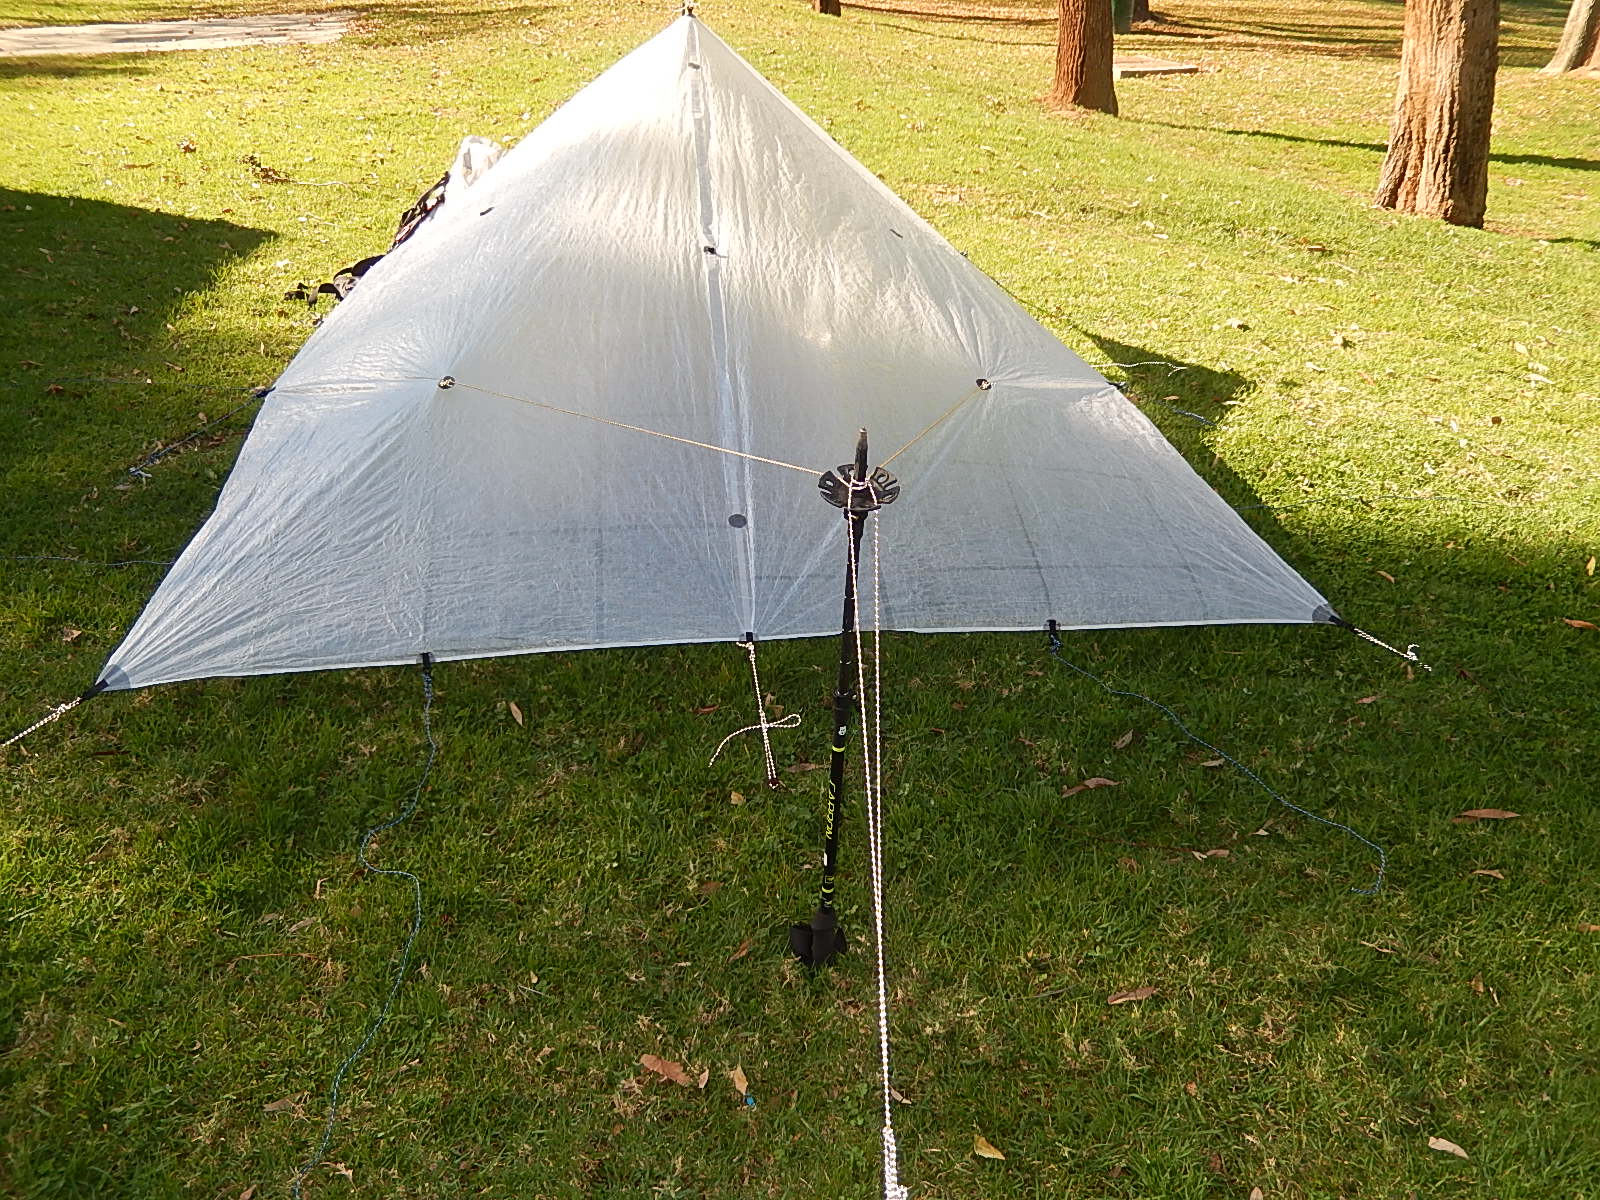
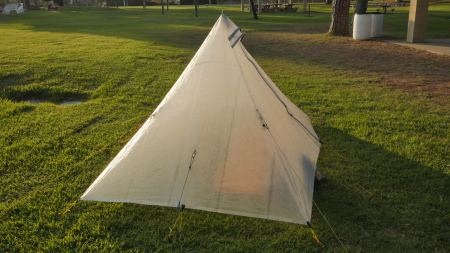
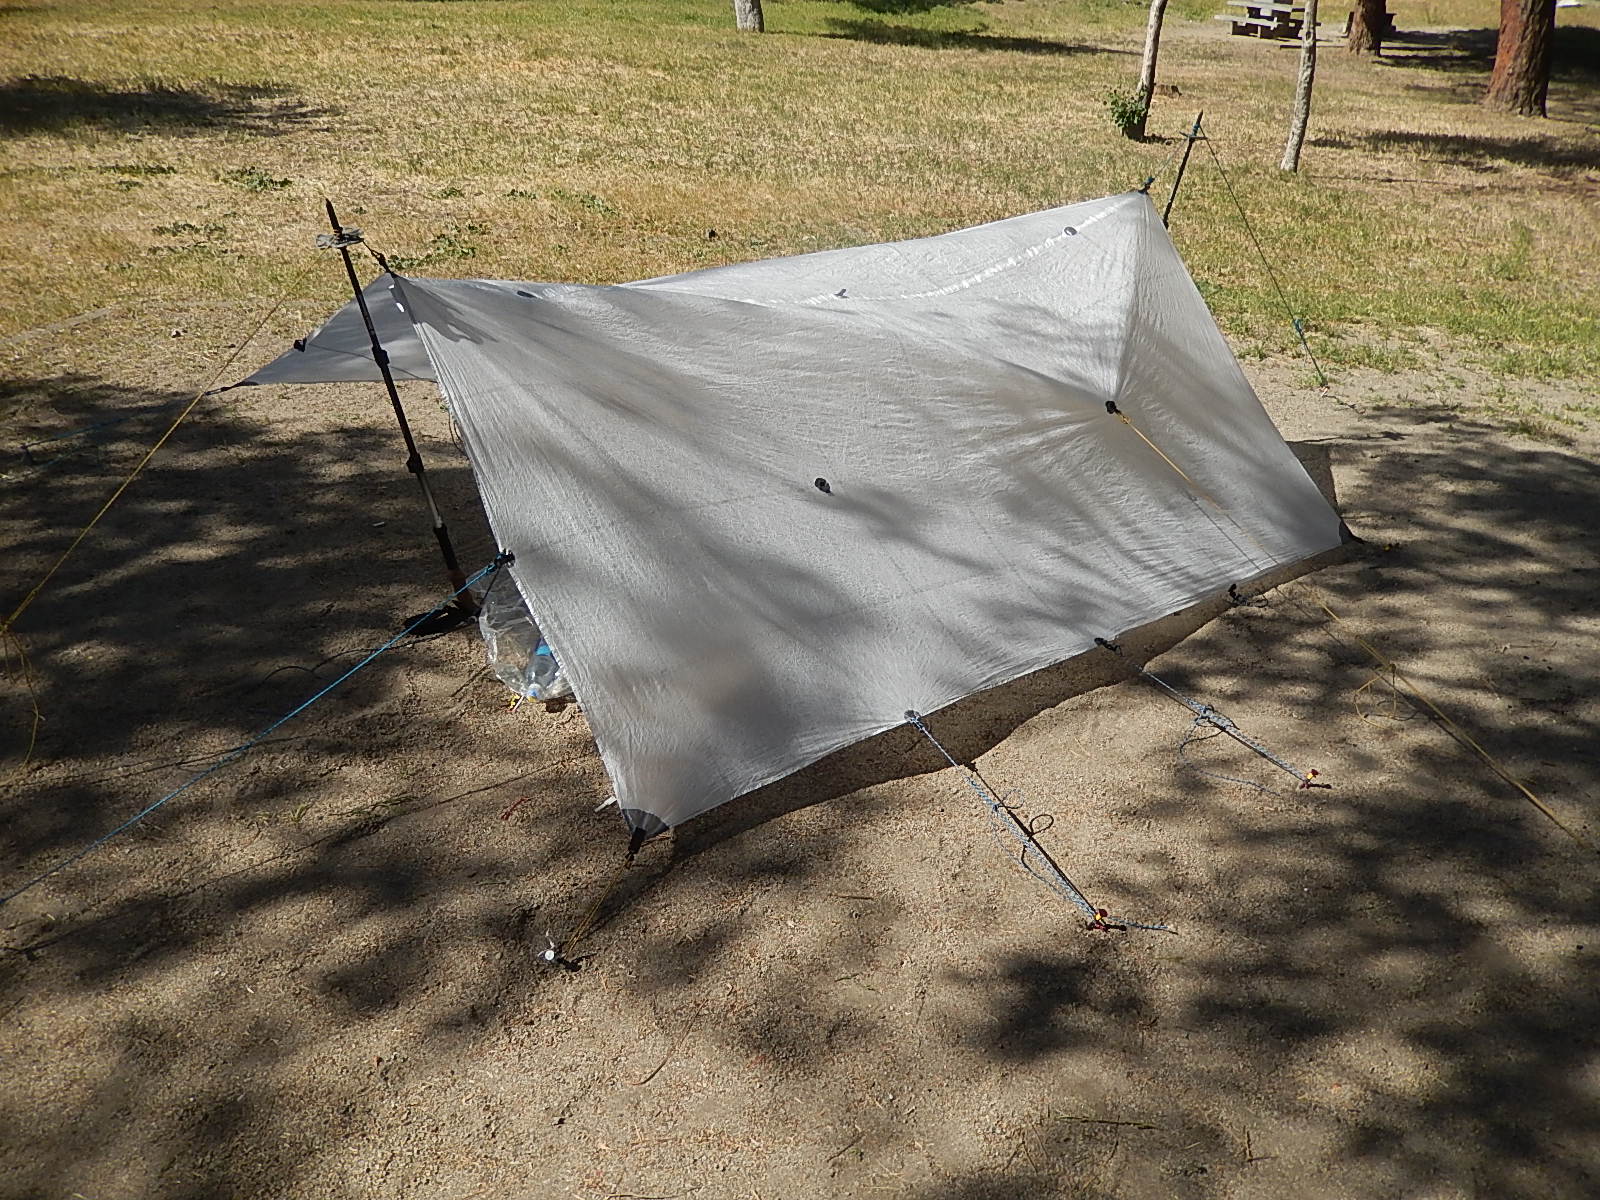
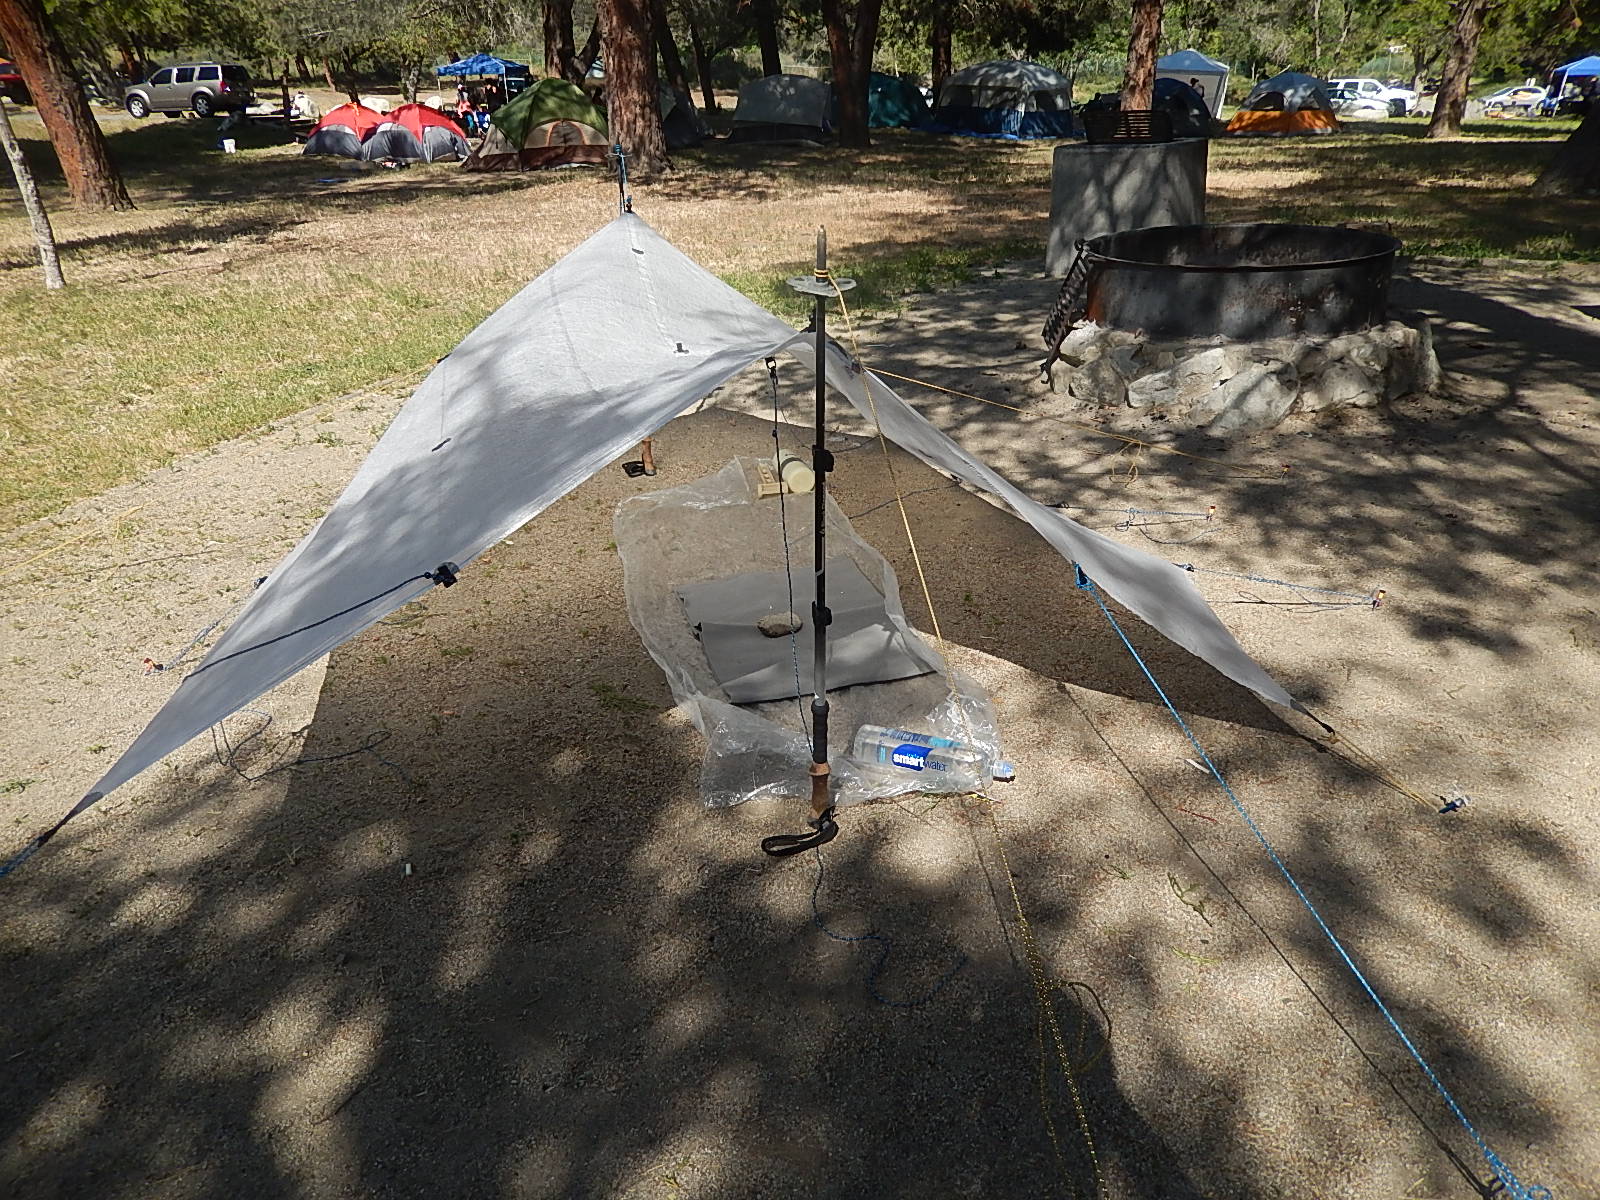
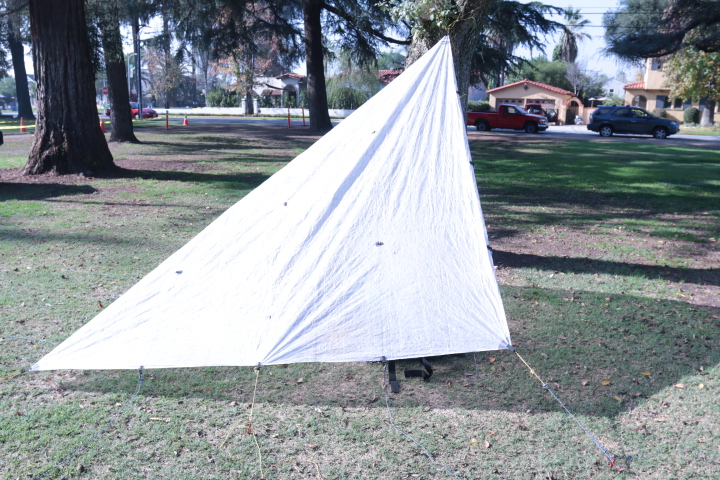
 These shots demo my default tarp setup: storm mode, with 2 long guylines on the rear panel anchors staked through the back trekking pole.
I ‘m using 14 stakes as a standard: 8 MSR Carbon Core stakes for the corners, each ridgeline, and 2 additional points as needed; a single MSR mini-Groundhog stake which can take a great deal of pounding; and 5 aluminum stakes with similar form factor to the CC stakes and large pounding heads.
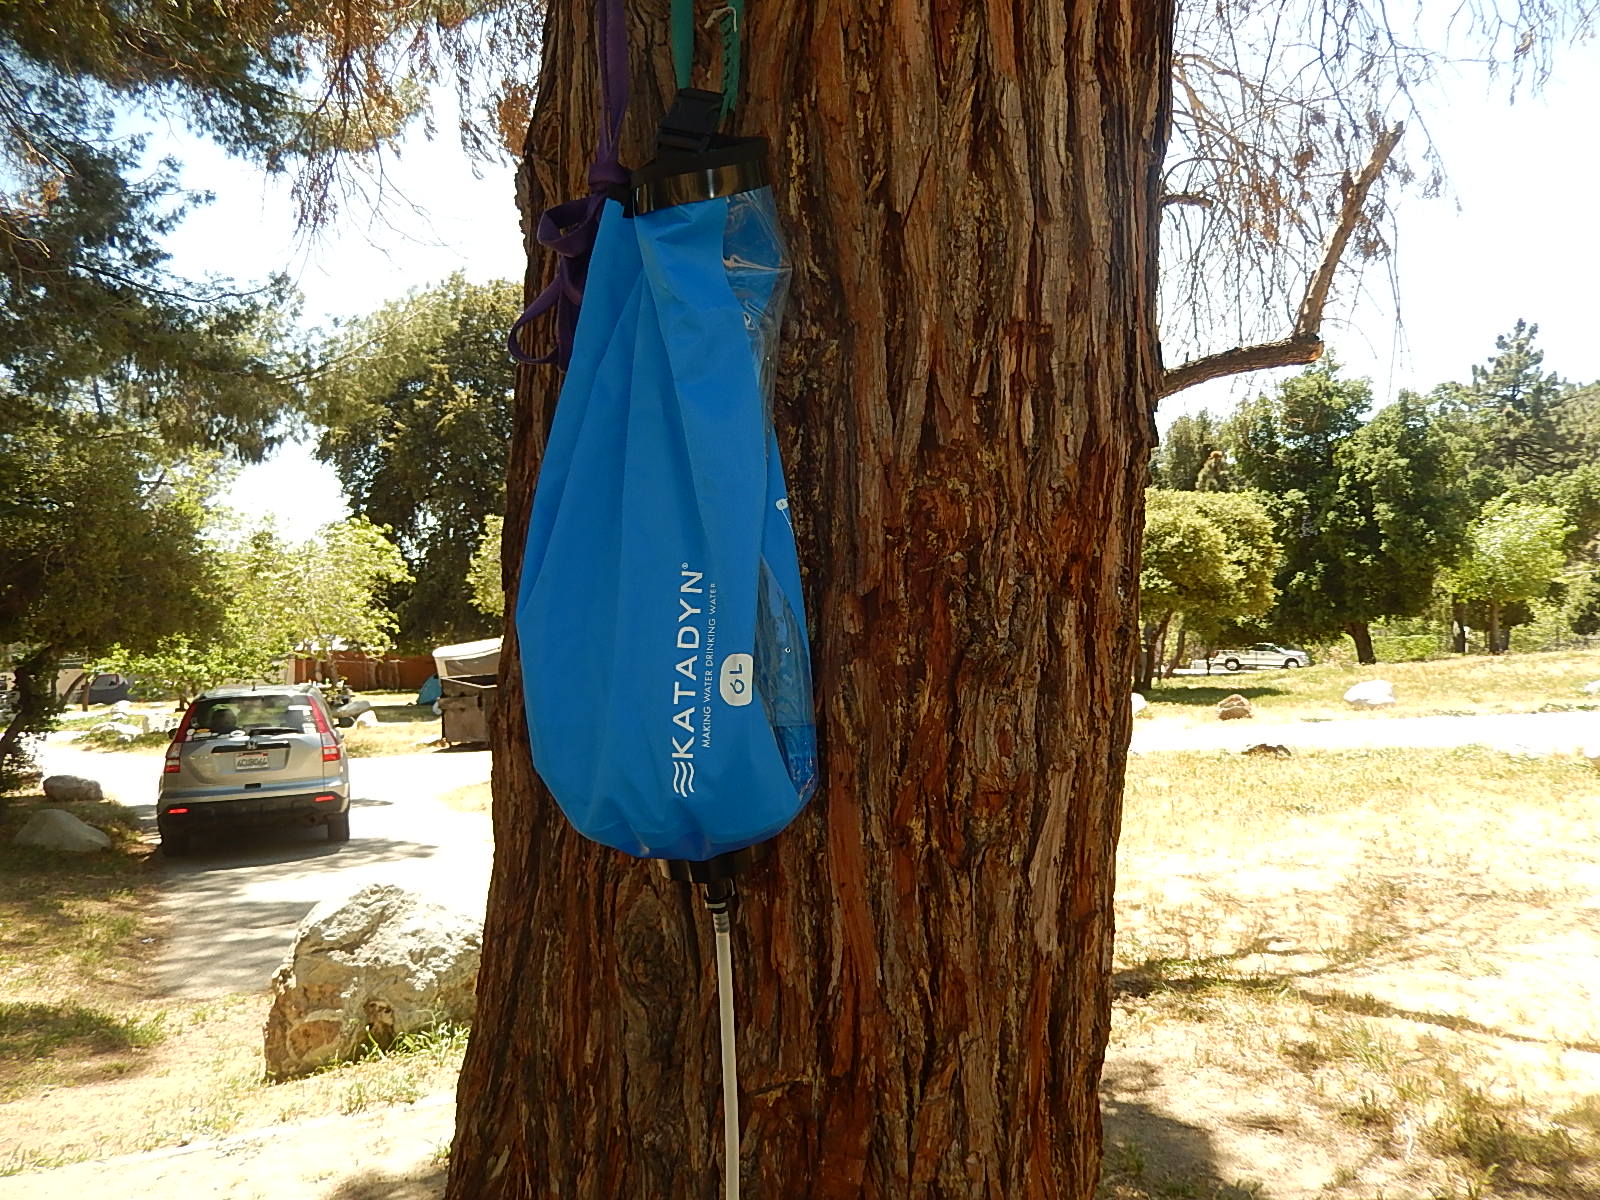
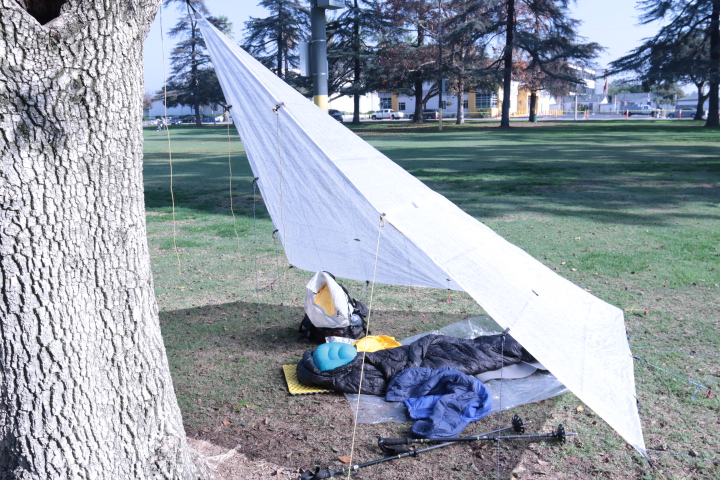
A nice bonus is that when using the REI clothesline as shown, there’s enough spare cord to use for rigging my vertical hoist to raise the netting of the biv sack off my face.
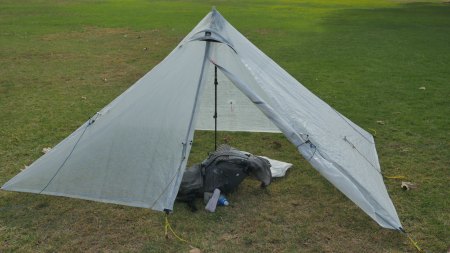
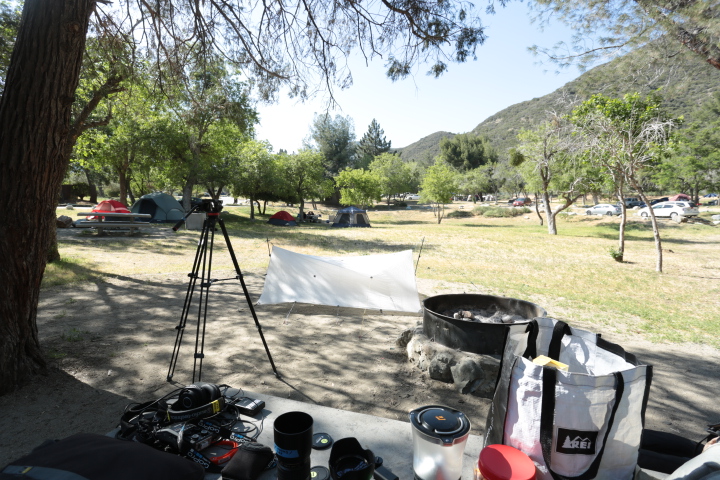
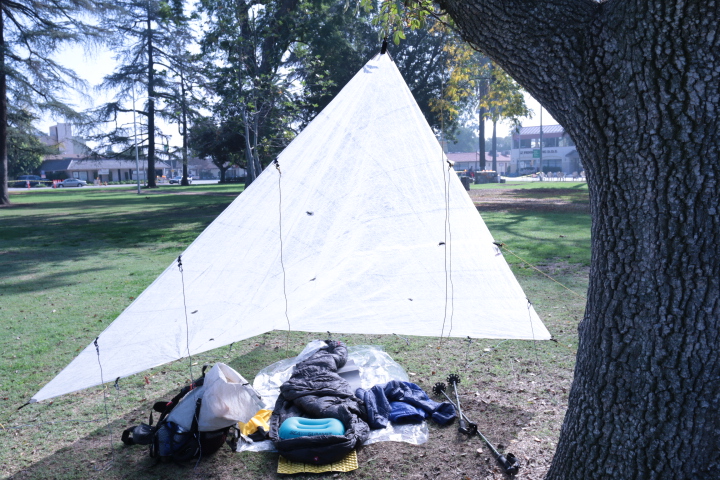
Today I was using both the ULA Catalyst and HMG Windrider 2400 packs, which are in the foreground.This setup allows cooking safely from within the tarp, with even better ventilation if opting for the A frame setup.


![]()
Specifications: area=72 sq ft; weight with all guylines=c 10 oz incl 10 pre-cut 3mm lines and 50 ft of added 2.75mm Sterling Glo-Cord; shelter for 1-2 persons;2 internal, metal ring-hang loops; 16 dedicated perimeter guypoints; minimal fabric stretch; 100% waterproof and windproof
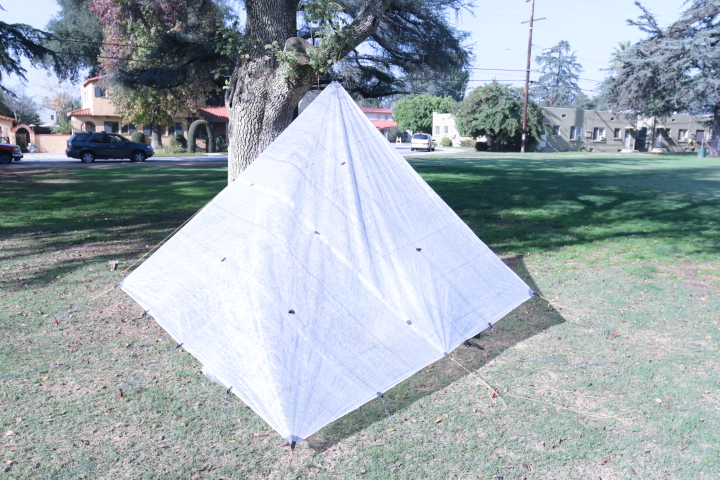
I’ve shown 2 of the 3 main rigging setups I plan to use: the ‘storm ‘ mode and ‘flying diamond’ mode. The other usual setup would be standard, ‘A frame’ mode.
